|
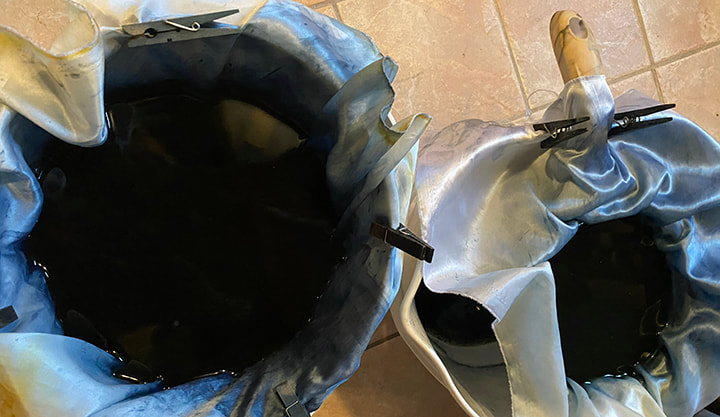
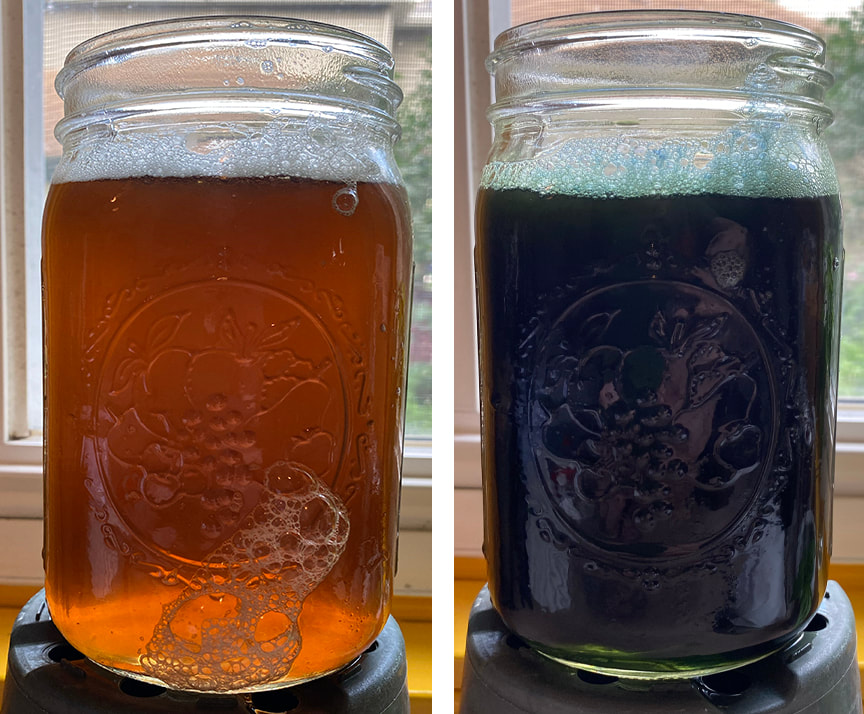
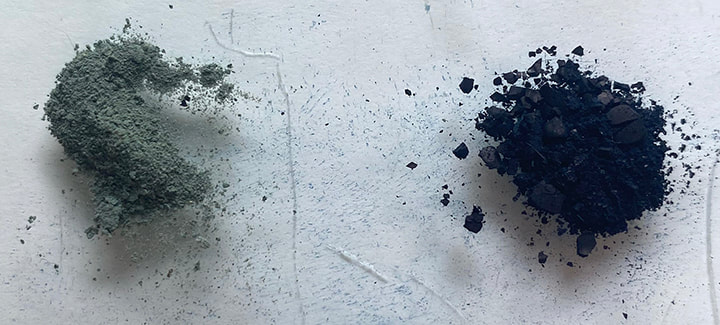
I harvested more than on June 19, but I used about the same amount of water when I processed it. This led to a super-concentrated batch, which of course led to new discoveries. More on that later in the post. I decided after adding the wood ash (to bring the PH up to 10) but before pouring it back and forth between the buckets (to oxygenate) to dye a bamboo rayon scarf. As is usual with both woad and indigo, when the vat is reduced (low oxygen) it’s a deep green, and so is the fabric when you first pull it out. But then when exposed to air (oxygen) it turns a true blue. In the case of fresh woad leaves like I was using, there is a significant amount of fugitive yellow in the leaves; and when I dyed the scarf, I had done nothing to get rid of that yellow. In any case-the scarf ended up a really lovely blue; so lovely it’s tempting to just keep it as is. But of course I’m curious about what if…I’ll get to that later. But now onto getting rid of the fugitive yellow. After dyeing the scarf, I did the pouring back and forth to oxygenate the infusion of woad leaves (I had already taken the leaves out, it’s like making tea.) Woad and indigo are actually pigments, that is, a solid; dye penetrates fiber, indigo and woad coat the fiber. When I used a higher water-to-woad ratio to make the “tea,” (see my last post) the heavier, solid pigment sank to the bottom, and the yellow liquid could be scooped or siphoned off the top. But this batch was SO PIGMENT HEAVY that the pigment didn’t settle at all-even after sitting overnight! I just went ahead and tried to strain it; normally, again, the yellow goes through the cloth and the blue pigment gets trapped on top of the filter cloth. But the “waste” water after I strained the liquid (first photo at the top of this post) was not yellow-it was really dark. Obviously there was a lot of pigment left, so I strained the “waste” water a second time. Sure enough, this second straining captured plenty more pigment on top of the cloth. Doing a more concentrated batch seems to be a great way to avoid lifting larger, heavier buckets! However, it means that the pigment won’t settle, and has to be strained at least twice. I’m kicking myself for not also dyeing a fabric swatch in addition to the scarf. That way I could cut the swatch in pieces, and try different stuff with the pieces to make comparisons. I wonder if next time I process woad, I gave the scarf an additional dip, if that would make the color deeper? I have this strange suspicion it wouldn’t do much! My reasoning is that there was SO MUCH pigment in that water, it was so concentrated, that the reason it didn’t go darker is chemical, not WOF (weight of fiber) to woad pigment ratio. So the second thing I want to do, is take some of the purified pigment, and reduce it again to make a dye vat, and then re-dye the scarf. My prediction is that without all the fugitive yellow still mixed in, the color of the fabric will go way deeper. Now I have to do another batch of woad, and put my theories to the test.
One last observation, woad is definitely a cut-and-come-again plant. The woad out at the NCC East 40 is happy that I’ve been persistently pulling the weeds to give it more room. Today-one day after I harvested the woad I’m showing in this post-you can’t even tell that I just harvested yesterday!
0 Comments
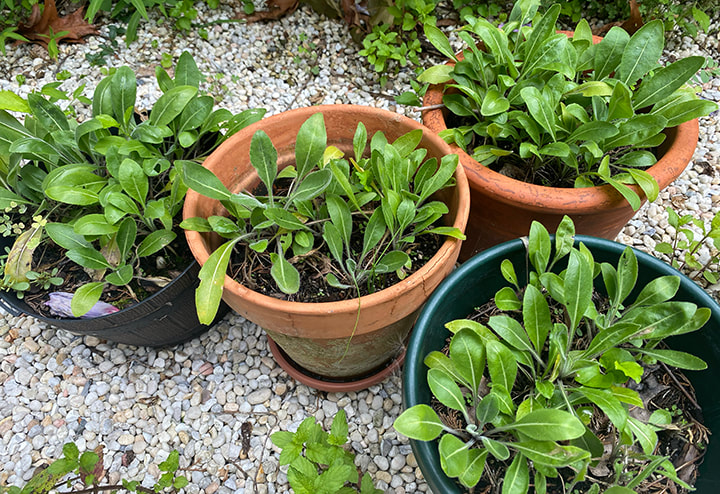
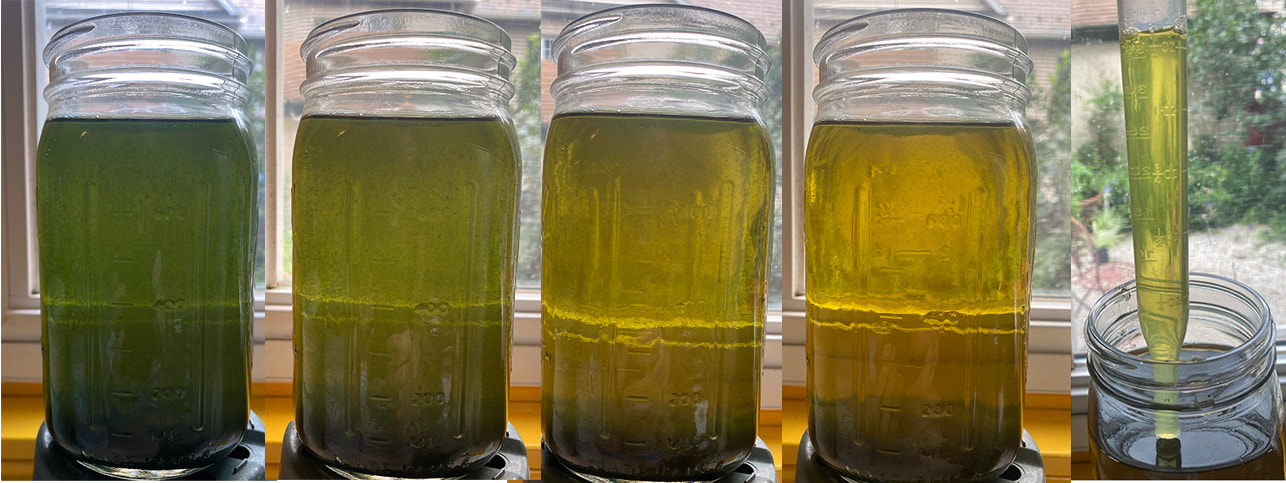 From left to right, the woad after ph was brought up to 10 and the liquid aerated. It looks green at left because the woad pigment, which is a solid, has not settled to the bottom. The other photos moving to the right are as more of the pigment settled; at right, I'm removing the clear yellow liquid with a turkey baster. Last year I had a bunch of empty flower pots and thought what the heck, let me see what happens if I grow woad in a small flower pot in my backyard-which does not get great sun. I should have harvested it last year, since first year woad is what you’re supposed to harvest. It blooms and goes to seed in the second year. But my back yard woad never flowered this spring, and I was curious if it was even worth harvesting such a small amount of leaves-only 50 grams worth, even though I harvested every leaf from the 4 pots. (See this post for how I process the woad.) The reason I decided to make this post, is that I put it in glass jars and photographed one of them as the woad pigment settled to the bottom of the jar. It’s just a good visual for that part of the process. In the last photo on the right above, I’m removing the yellow liquid with a turkey baster. The yellow is not a dye, it’s very fugitive and needs to get separated from the nice blue pigment. Results? Quite good! Not much quantity, because I had so few leaves, but especially for second year woad which isn’t supposed to work, it was a very rich, intense color. It was so close in quality to my last batch, that I just added what I got from this batch to that one. (My last batch was pictured in this post.woad-over-weeds-at-least-a-momentary-victory.html)
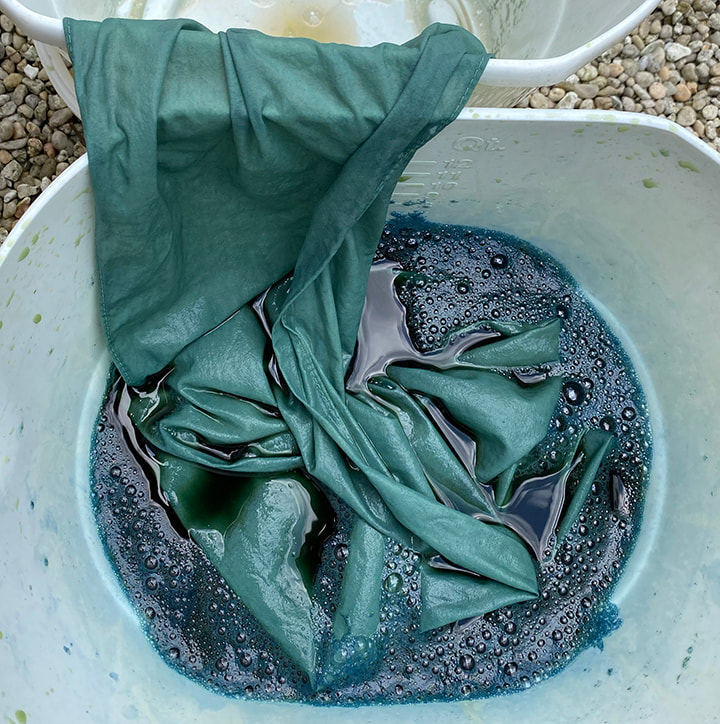
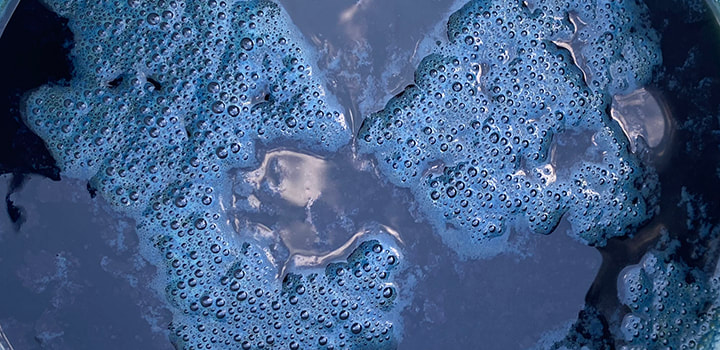
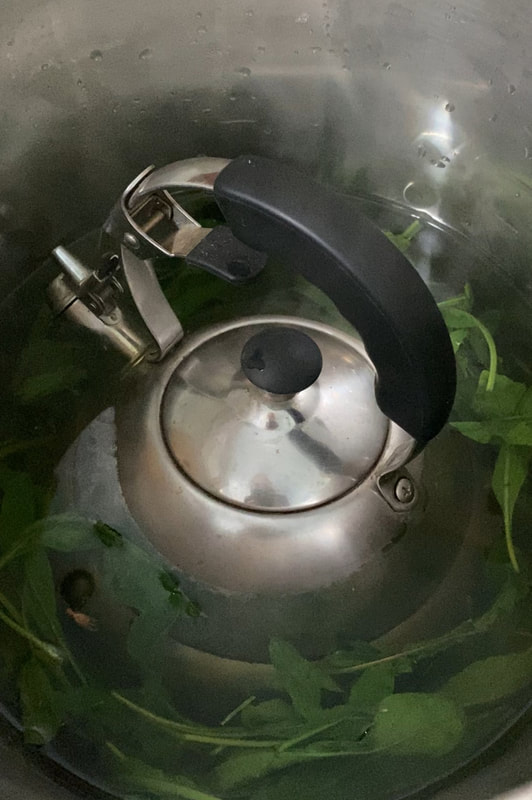
It’s a constant battle to pull out the weeds in my woad bed, to give the woad some room to grow. Woad-which has the most active ingredient (indigotin) we need for both dye and pigment-is harvested from first-year plants which grow very close to the ground. The local weeds jump up quickly, leaving the woad literally in their shadow. This past week I pulled wheelbarrows full of weeds out of the woad bed, and the woad responded almost in front of my eyes, I swear the woad was visibly more abundant by the end of the week. Tired as I was yesterday, I wanted to capitalize on this temporary moment of victory-so I harvested some woad. The weird thing was just how easy it seemed. I would compare it to making dinner; it took effort, yes, but it wasn’t like it sucked up the whole day, just one smallish part of a normal day. (If you want to see the whole process, reference this blog post.not-what-youre-supposed-to-harvest-in-october.html) I used less than 500 grams (about a pound) of fresh woad leaves. The first step is like making tea; you don’t boil the leaves, you pour the water onto the leaves and let them steep. You’re supposed to weight the leaves down, so they are surrounded by water during the steeping; I’ve used bricks inside of tupperware and all kinds of crazy things to try to do this, but last night’s innovation was I just stuck my tea kettle (with water in it for weight) on top and it was so easy! The kettle of course has a handle, so it was easy to lift the kettle and stir occasionally. O.K., not exactly earth-shattering but when you do something enough times, all these little discoveries and refinements help to streamline the process, and make it easier. I got a good yield of super-dark, rich pigment. (See right above) Once I dry the pigment into powder, I like to put each batch into its own little jar. I can compare the color of batch to batch that way, and this batch was definitely top-notch. For comparison, once I did a huge batch, and just didn’t have the patience to wash/strain out all the (non permanent) yellow from the liquid, long story short. I just dried the slurry as-was, and it was a lighter, kind of greenish blue, not the “true blue” that I just got in this smaller batch. So, I put the powder in a nice transparent glass jar and have kept it in the sunniest window in my house. The blue woad pigment is permanent, the yellow not permanent. In the 2 years that the pigment from that batch has been in my window, it has become increasingly blue! I would be wary of using that batch for a painting that I want to last indefinitely, but it was a fun experiment. Even after two years though, it’s not as good as the much more pure batch I made yesterday. Moral of the story I think, is make more small, easy to do batches.
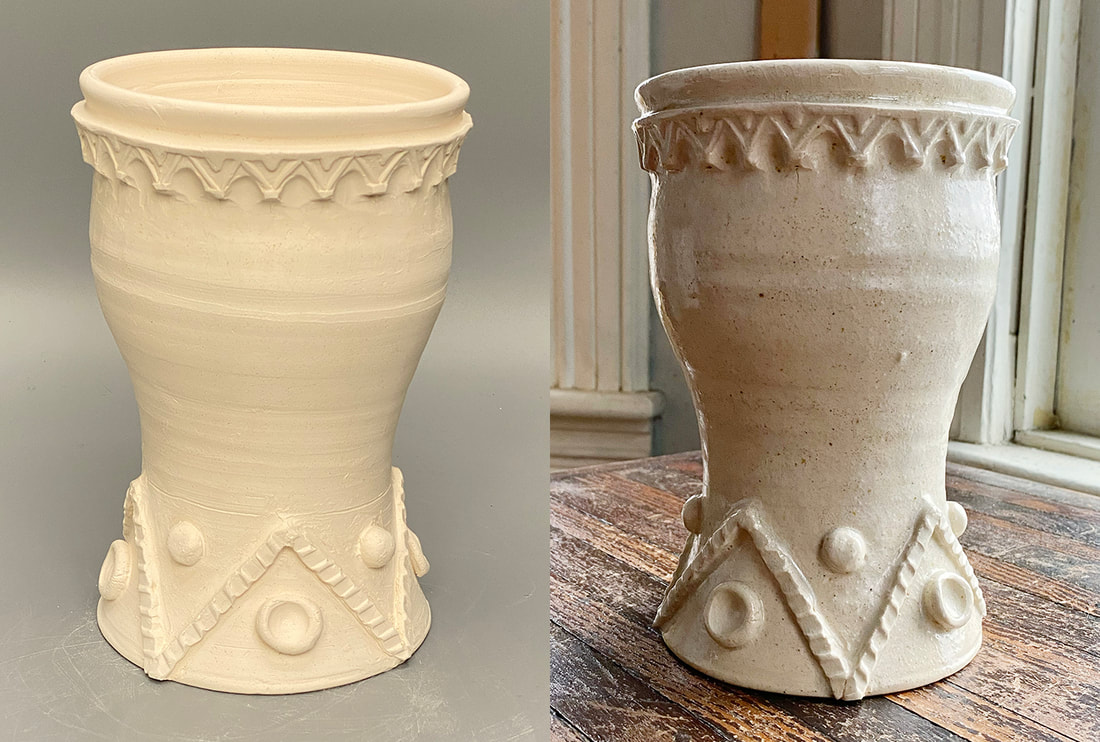
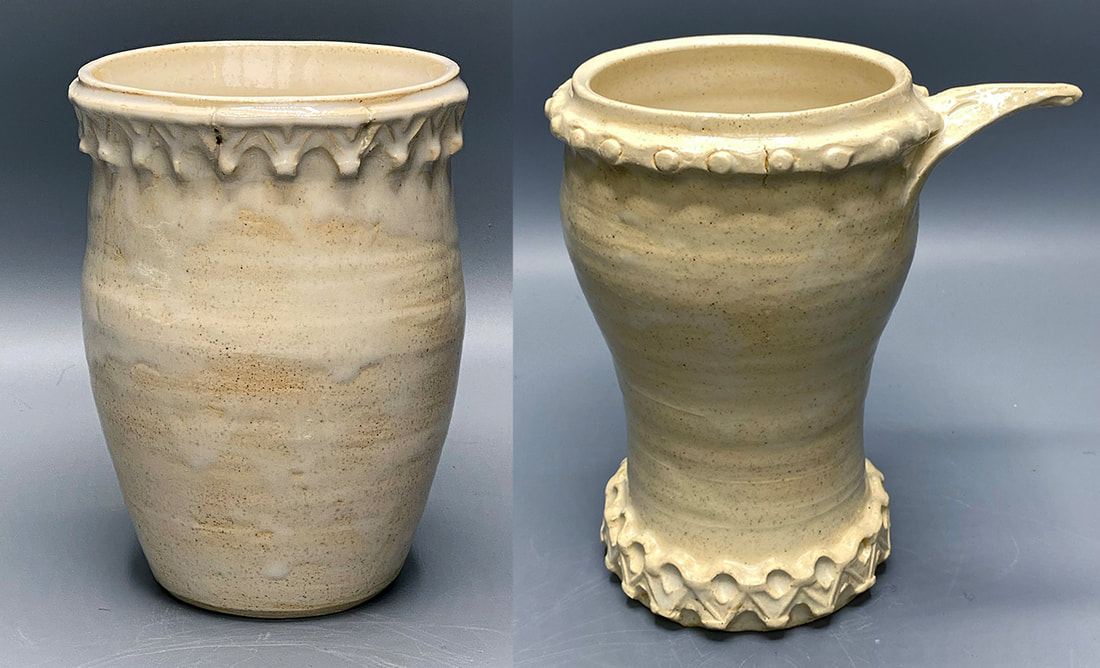
In my first post on my new series of Medieval inspired ceramics, medieval-inspired.html I wrote that “So far only a few of these pieces been glaze-fired.” I think one of the strengths of this whole series is the interaction between a traditional thrown form with decorative/geometric/abstracted elements and incomplete figurative elements. An essentially one-color glaze keeps the ambiguity and imaginative leaps that the viewer can enjoy. I have come up with two strategies for making the glazes have some depth, variety and interest without getting contrived looking; local (and sometimes wonky) materials and wood kiln firing. As you can see from the vase above, glaze is not always going to hugely change the look of the piece. Even with the different background, lighting and point of view, this vase didn’t change its essential character when glazed. I formulated the glaze that I used featuring rock that I picked up off the side of route 611 in Easton. You might think that I could have used just any white glaze; but look closely at the comparison photos below. On the left, the vase was glazed with the glaze that I inherited in the ESU studio, with all commercial ingredients. On the right, another vase glazed with my rock glaze; I know it’s not a huge difference, but I prefer the rock glaze. So on the one hand, the glazing doesn’t necessarily radically alter the look of the piece from its pre-glazed state. But on the other hand, the glaze-and how it’s fired-really do matter, and give not only practical advantages like hardness and waterproofing, but improve aesthetics as well. The vases above were fired in an electric kiln; the first post I made about this series showed work that was fired in a one-day wood kiln firing. Wood kiln firings can have many serendipitous effects, between wood ash landing and melting onto the work (that was probably how glaze originated) fire hitting the work and the reduction atmosphere which causes both the clay and glaze to achieve different effects. The longer the firing, the more wood ash you are going to get, which is one of the reasons I’ve held off firing a number of my pieces; I will be taking the Anagama Wood kiln firing workshop at Peter’s Vally next month, where I can bring 30 pieces! Whether I’m using rock glazes or wood kiln firing (or both) my goal is the same; I want natural effects, not contrived painting/coloring.
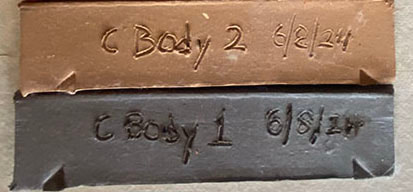
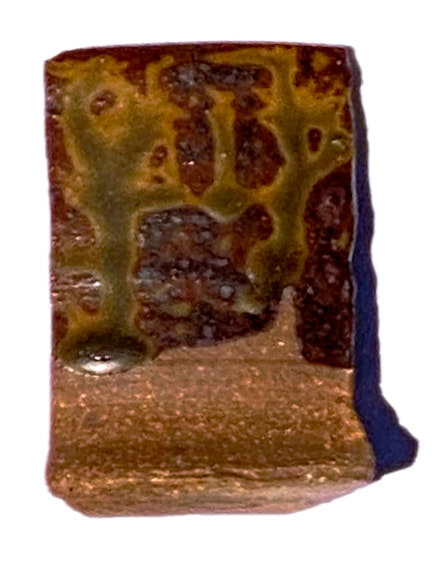
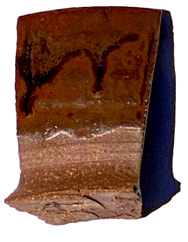
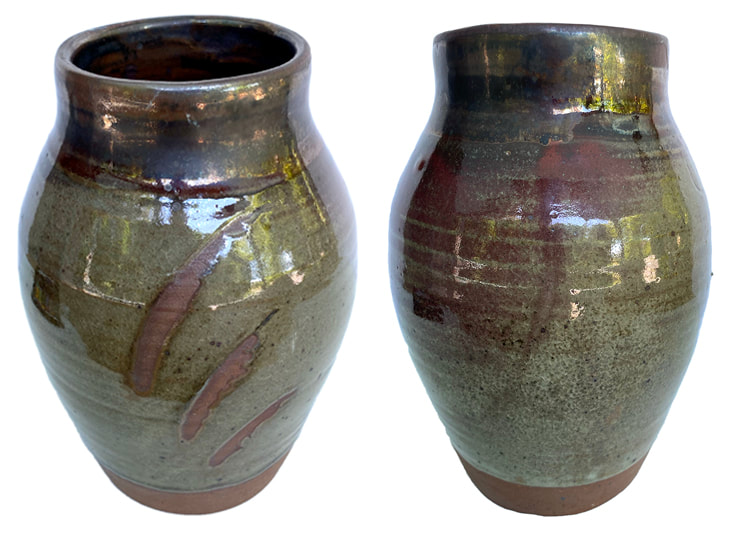 Vase made from the new clay body featuring East 40 clay. You can see the clay with no glaze at the bottom, and where I did strokes of wax resist as seen on the view to the left. A glaze featuring the East 40 clay was used at the top of the pot, you can see it's darker than the glaze below the neck of the pot.. As promised, some results from the test kiln firing. After making the part 1 post, I realized that it was just too technical for a blog post. I reached a kind of crossroads where I realized I needed to create a section of the website for technical information. If you want something more in depth than this post, go to my new Ceramics-Technical page, and the pages that branch off of it. The little test kiln did reach cone 10 (approx. 2,381 F) but not without a battle of many hours in the sweltering heat. Luckily, it was worth it. The firing gave us really critical information; how will the new clay body behave at high-fire temperature in reduction (oxygen starved) kiln atmosphere, which is how we fire the wood kiln? And, how will the 25 glaze recipe variations with the East 40 clay look and behave on the new clay body? Overall, the results were a smashing success. Both clay body, glazes, and the way the glazes look on the clay body passed with flying colors. Again, I'm not going to go into all the technical results here, but I do want to show you some of the highlights of what came out of the little kiln. In the test bars above, you can see the color of the clay with no glaze for yourself. In addition to the tile in the test kiln firing, the dark one at the bottom of the photo, Gabbry Gentile was kind enough to fire the one on top in the electric kiln up at the ceramics studio in Penn Hall on the main campus. I formulated this clay body for high temperature firings like we do in the wood kiln at the East 40; the real shocker, was that this clay body works at the medium range temperature used in the studio on campus! I won't go into the technical details here, but suffice it to say I was honestly shocked at how well this clay performed in an electric kiln at mid-range temperature! Ash glazes are supposed to show dramatic drips; the trick is, you don't want them to run off the pot. This test tile was photographed on its back because of sun glare, but it was standing up on vertical when fired in the kiln. The pleasant surprise was that all the variations of the ash glaze stayed up on the tile, none of them ran off the tile at the bottom which is a big problem with a lot of ash glazes. Many ash glazes can only be used at the top of the pot, they are so runny. This was the runniest variation, and even it didn't run off the tile. Long story short, we already have usable glazes based on the East 40 clay and wood ash, and they work great on the new clay body! Above is the simplest glaze recipe I tested-and my favorite result! The drips are less dramatic without the eggshell. It's such stable glaze that I can see using it on an entire pot, not just at the top for a drippy effect. The color comes primarily from whatever is in the East 40 clay, educated guess, a lot of iron.
Getting back to the vase at the top of this post, the dark part at the top is the same as the tile above, except there is an addition of copper oxide. The pot was first dipped in a glaze we had on hand from previous wood kiln firings, we wanted to see how it worked on the new clay body. The red you see, especially on the view to the right is actually from the copper-rich glaze I was testing at the top! All in all, we got lots of very helpful information from the test kiln firing. In all honesty, I didn't expect this much success in a first time at full-temperature firing! |
Cindy VojnovicArtist & Educator Archives
September 2025
Categories
All
|

 RSS Feed