|
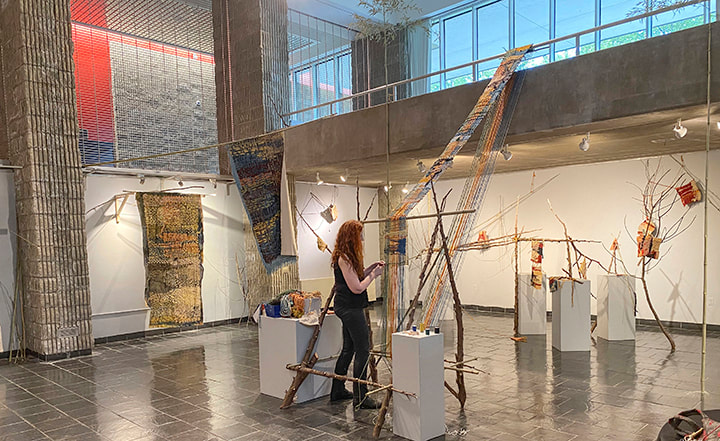
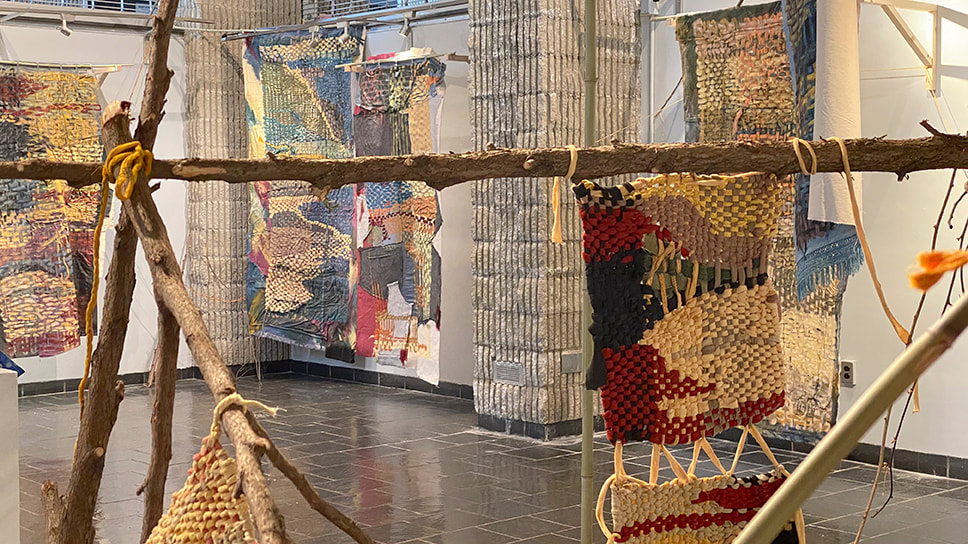
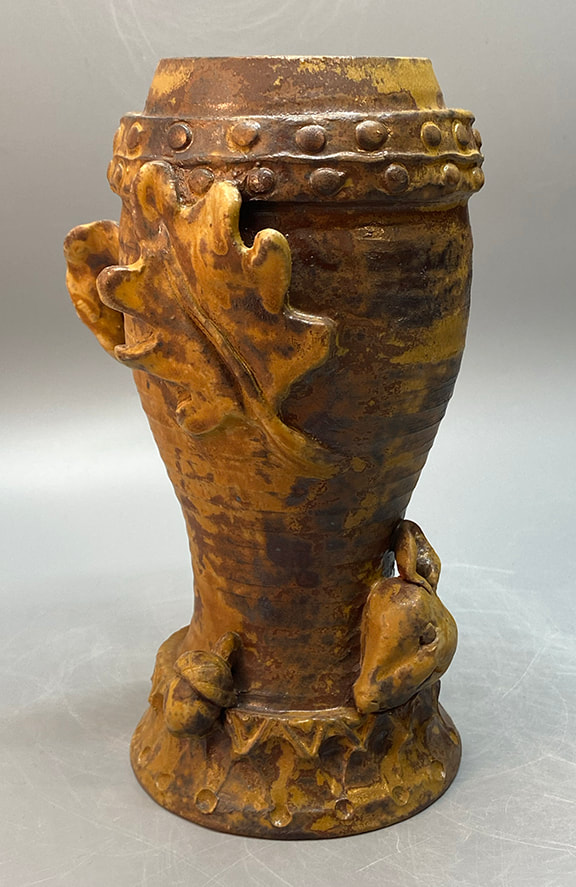
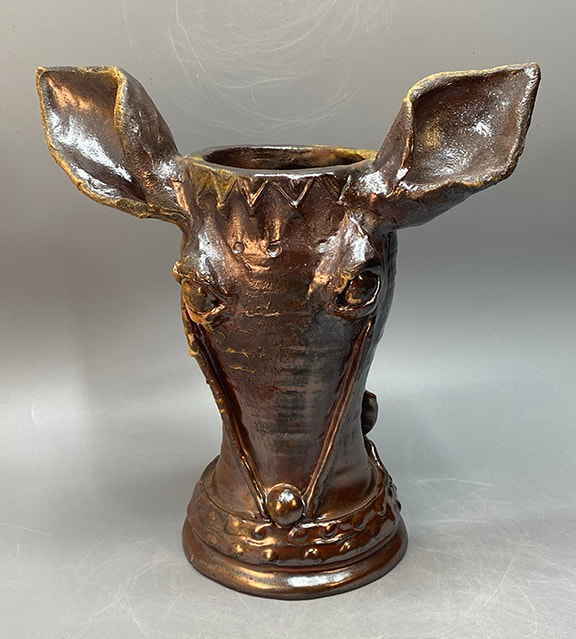
@ Book and Puppet March 15 – June 7 2025 Loom raising 5-8 Friday March 28 Reception 3-6 p.m. Saturday April 26 This coming week I am going to be hanging a solo exhibition” curated by Arta Brito that brings together my recent work from the past few years, the fiber, painting and ceramic. I was so happy that Arta could see the connection between growing plants to dye recycled fabric and make paints, for example, with making clay and ceramic glazes from local materials. I’m literally going to the earth for my materials, and participating in historical, even ancient forms of making. In a world that is becoming ever more virtual and artificial, I hope people can enjoy the “grounding” of this work when viewing it as much as I felt when making it. The fixed parts of the show will be up by March 15, available for viewing during all of Book & Puppet’s regular hours. There will be a “loom raising” event on Friday March 28, the public is invited to come and help me construct a warp-weighted loom in the gallery! I will demonstrate how I take old bed sheets, clothing etc. and turn them into cord or “t-shirt yarn” that can be used for weaving. I’m going to use the loom and naturally dyed, repurposed fiber to do a weaving on this loom over the course of the exhibition. This show will have the finished 27 foot weaving that I made on the loom I built in the East Stroudsburg University Madelon Powers Gallery for my 2021 solo exhibition there. (See photo below.) Before I did the warp weighted loom, I used a pin loom to “sketch” in the same naturally dyed, reclaimed fibers I eventually used in the warp-weighted loom. These modules were the models for the large paintings I made-on repurposed, reclaimed fabric of course-that are also in the exhibition. Since the modules are small, they can “dance” around the exhibition space, there are two dozen of them, see if you can find them all! While dyeing the fabric, I was kind of gob-smacked to learn that some of the pigments that I had been painting with for decades were originally made using leftover dye baths! I took a deep dive into making my own pigments, and paint during my residency at the NCC East 40. I did a series of imaginary landscapes on clay panels I made, where ALL of the colors were paints I had made from pigments I processed. This show will include most of these imaginary landscapes. So for example you can see weavings that include fiber dyed with madder root, and paintings that use paint made from the leftovers of the dye bath used to dye that fiber in the same show. These natural landscapes also include paints made from clay dug from the NCC East 40, and ceramic works made utilizing that same clay. The ceramic works are the most recent, except of course for the weaving that will be performed over the course of the show. A through-line and progression here are the materials-from the earth-that are used in all the work.
0 Comments
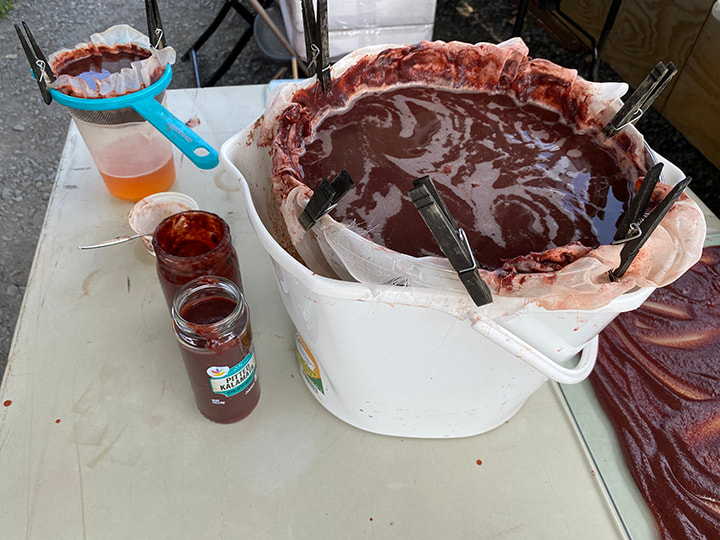
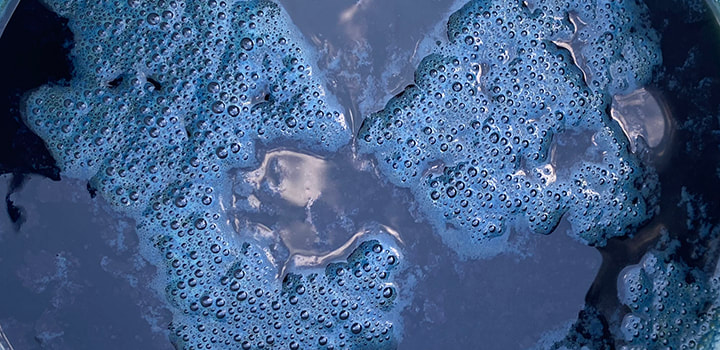
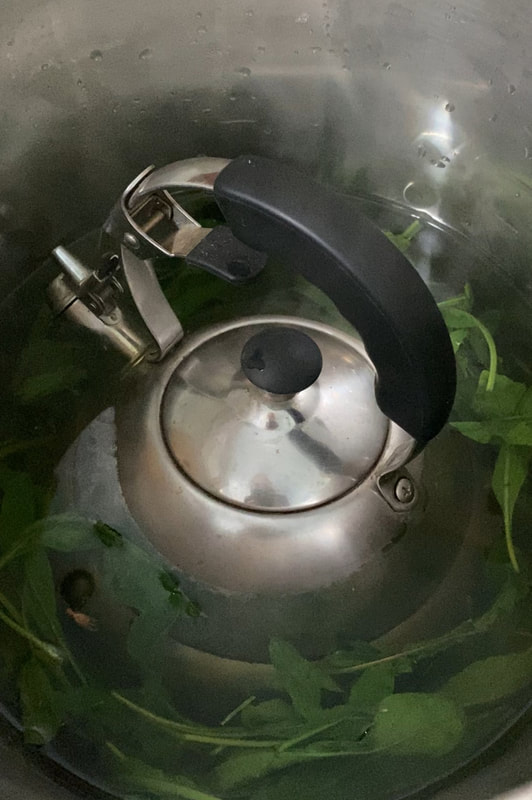
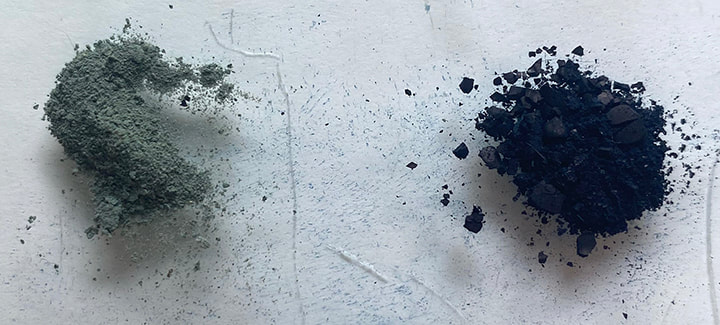
It’s a constant battle to pull out the weeds in my woad bed, to give the woad some room to grow. Woad-which has the most active ingredient (indigotin) we need for both dye and pigment-is harvested from first-year plants which grow very close to the ground. The local weeds jump up quickly, leaving the woad literally in their shadow. This past week I pulled wheelbarrows full of weeds out of the woad bed, and the woad responded almost in front of my eyes, I swear the woad was visibly more abundant by the end of the week. Tired as I was yesterday, I wanted to capitalize on this temporary moment of victory-so I harvested some woad. The weird thing was just how easy it seemed. I would compare it to making dinner; it took effort, yes, but it wasn’t like it sucked up the whole day, just one smallish part of a normal day. (If you want to see the whole process, reference this blog post.not-what-youre-supposed-to-harvest-in-october.html) I used less than 500 grams (about a pound) of fresh woad leaves. The first step is like making tea; you don’t boil the leaves, you pour the water onto the leaves and let them steep. You’re supposed to weight the leaves down, so they are surrounded by water during the steeping; I’ve used bricks inside of tupperware and all kinds of crazy things to try to do this, but last night’s innovation was I just stuck my tea kettle (with water in it for weight) on top and it was so easy! The kettle of course has a handle, so it was easy to lift the kettle and stir occasionally. O.K., not exactly earth-shattering but when you do something enough times, all these little discoveries and refinements help to streamline the process, and make it easier. I got a good yield of super-dark, rich pigment. (See right above) Once I dry the pigment into powder, I like to put each batch into its own little jar. I can compare the color of batch to batch that way, and this batch was definitely top-notch. For comparison, once I did a huge batch, and just didn’t have the patience to wash/strain out all the (non permanent) yellow from the liquid, long story short. I just dried the slurry as-was, and it was a lighter, kind of greenish blue, not the “true blue” that I just got in this smaller batch. So, I put the powder in a nice transparent glass jar and have kept it in the sunniest window in my house. The blue woad pigment is permanent, the yellow not permanent. In the 2 years that the pigment from that batch has been in my window, it has become increasingly blue! I would be wary of using that batch for a painting that I want to last indefinitely, but it was a fun experiment. Even after two years though, it’s not as good as the much more pure batch I made yesterday. Moral of the story I think, is make more small, easy to do batches.
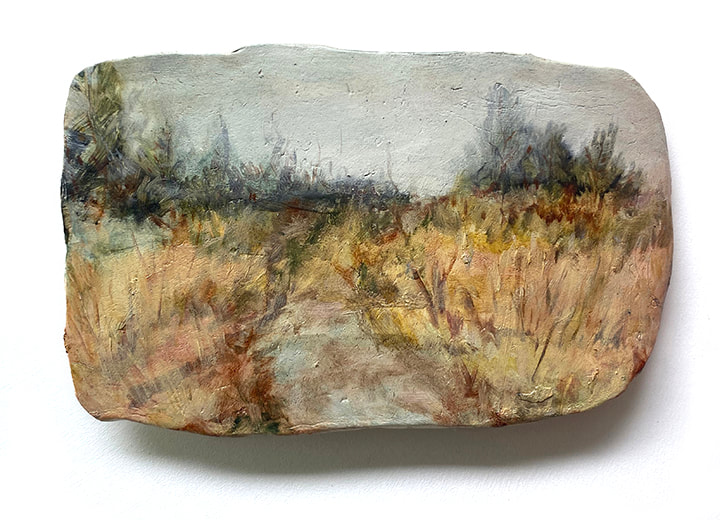
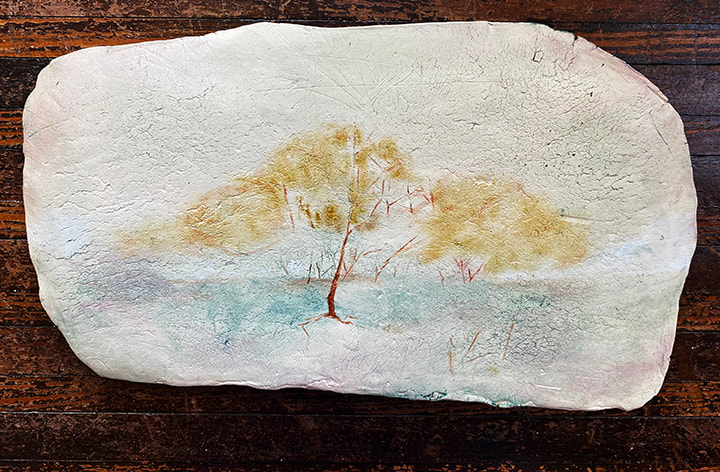
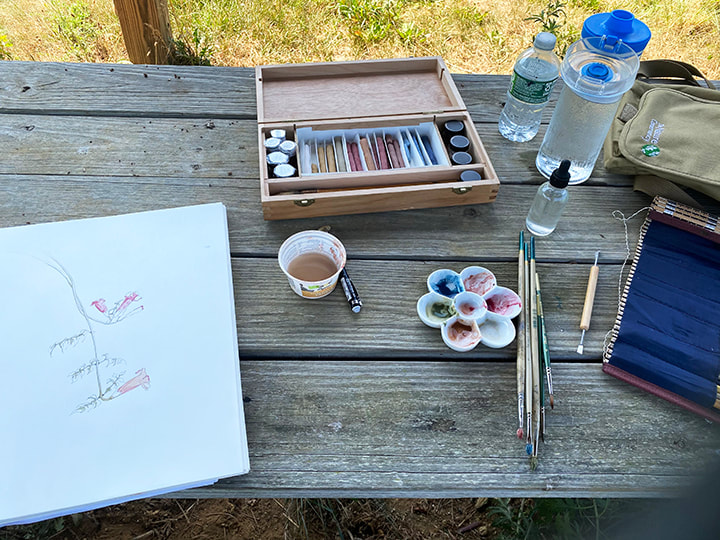
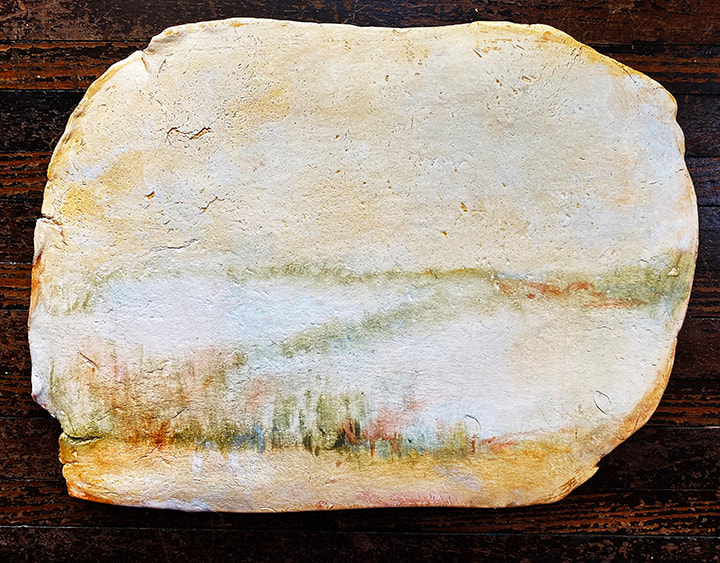
The hard thing about imaginary landscapes on clay (see my first post on these) is that it’s so difficult to know when they are “done.” The interaction of translucent paint over the texture of the clay slabs can look so good in the early stages that it’s hard to know if any more is needed. I showed two paintings in the ESU Faculty show this fall that were minimally worked, but I’ve decided to add more to both of them because while I liked them from close up, from a distance they weren’t reading very well. And, as I had worked more and more into other paintings while those two were out of the studio in the faculty show, I decided I liked more layering. My fear had been that the more layers of paint, the less the clay would play an integral role in the painting. But after adding a lot of layers on some of the paintings I realized that the “clay-ness” of the pieces was still playing a big role in the work. I need to take more photos, but, here are a few paintings as they are at the moment-the paintings’ progress. The primitive and labor-intensive processes of growing dye plants, making natural dye, making pigments including from the natural dye, making paints from the pigments and making clay structures to paint them on took up the bulk of this summer’s residency. Now I’m finally using all those materials! Around August first, I started using only oil paint I had made in the residency on the clay slabs, and then tried out the watercolor to tint a pencil drawing I had made of something (I’m not sure what kind of plant it is) growing in the community garden. After only 3 days of painting, it was pretty clear what was missing; a true brighter, lighter yellow and a more opaque white. Throughout history, from cave painting onwards, many artists have done amazing work with very restricted palettes such as brown, black and white. The most restrained color palettes, especially monochrome, nearly always use white. Problem is, modern artist paints generally use metals for white. Historically and to this day lead white was used, now mostly titanium and some zinc are used for white. The processes to make the metal paints are just not something I’m NOT going to get into, because of how involved they are, the equipment needed and how potentially toxic it can be. I first tried chalk from champagne, France-a natural white material I had on hand because it was used in the pastel and gouache paints I made. I quickly learned why chalk is used to make pastel and gouache-it’s almost transparent. If you add chalk to a paint or pastel, it changes the texture and working properties, but what you see is not so much the chalk but whatever the pigment’s color-blue, red, yellow etc. The chalk just wasn’t opaque enough. Making my own set of paints, and using them, has given me an appreciation of what is essential and what isn’t. I'm using far fewer colors, and it's frankly pretty interesting how far these few homemade paints can go. I plan to solve the white dilemma with white clay for white. I know white clay used to be mined from this area, and hopefully I’ll eventually be able to find some local white clay. With the residency over and fall classes almost here, I’m going to cry uncle and “cheat” with some commercially made white until I can make a white from clay. When it comes to the true yellow, I’m confident I can do this myself with natural, local materials. I have some dried weld that Marla grew for me in her dye garden, and weld is one of those dye plants that was historically used to make lake pigments. I’ve made lake pigments before, and I’m hoping to just make do with the garden gold until I can make pigment from the weld. At this point I haven’t cheated and used any commercially made yellow paint. I’m really enjoying exploring the imaginary landscape idea with my homemade natural paints on the clay slabs. I work on a bunch at a time, working on each a little each day, building up the colors. I do of course mix the colors, but I also use layers of translucent paint, where one layer is dry before I add the next layer. The layers are thin so I don’t lose the texture and properties of the clay slabs. The weight of the clay, the physicality is important. They are not images on a “blank” white picture plane. I’m not trying to illustrate a landscape, but to allude to one.
It’s hard to know when these paintings are “done.” I put two in the ESU faculty show that are so minimal that it was hard for me to accept they were finished. The show opens the first day of the semester, August 29, at the Dunning Gallery on NCC’s Monroe campus. There are paintings in progress in my studio that already have much more paint on them than the two in the show, but they are not “done” yet because to me they just aren’t doing everything they need to do as a painting. When a painting gets to a point where it doesn’t need anything-where if you did anything more it would make it worse-it’s done. The art is figuring out when you are at that point! |
Cindy VojnovicArtist & Educator Archives
September 2025
Categories
All
|


 RSS Feed