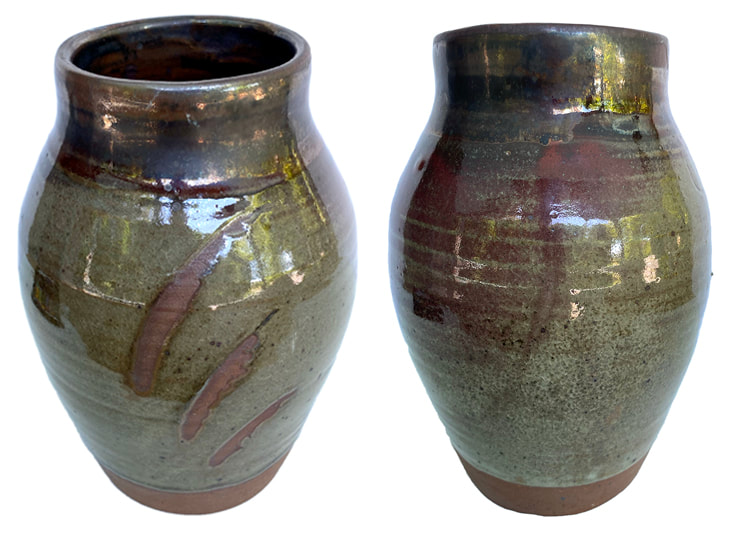
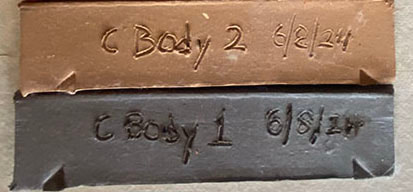
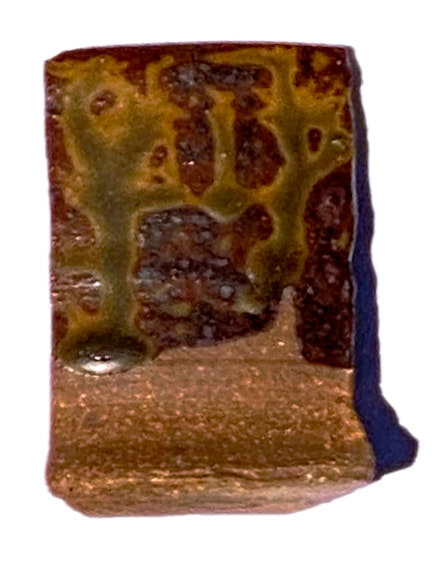
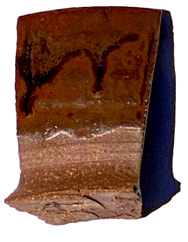
 Vase made from the new clay body featuring East 40 clay. You can see the clay with no glaze at the bottom, and where I did strokes of wax resist as seen on the view to the left. A glaze featuring the East 40 clay was used at the top of the pot, you can see it's darker than the glaze below the neck of the pot.. As promised, some results from the test kiln firing. After making the part 1 post, I realized that it was just too technical for a blog post. I reached a kind of crossroads where I realized I needed to create a section of the website for technical information. If you want something more in depth than this post, go to my new Ceramics-Technical page, and the pages that branch off of it. The little test kiln did reach cone 10 (approx. 2,381 F) but not without a battle of many hours in the sweltering heat. Luckily, it was worth it. The firing gave us really critical information; how will the new clay body behave at high-fire temperature in reduction (oxygen starved) kiln atmosphere, which is how we fire the wood kiln? And, how will the 25 glaze recipe variations with the East 40 clay look and behave on the new clay body? Overall, the results were a smashing success. Both clay body, glazes, and the way the glazes look on the clay body passed with flying colors. Again, I'm not going to go into all the technical results here, but I do want to show you some of the highlights of what came out of the little kiln. In the test bars above, you can see the color of the clay with no glaze for yourself. In addition to the tile in the test kiln firing, the dark one at the bottom of the photo, Gabbry Gentile was kind enough to fire the one on top in the electric kiln up at the ceramics studio in Penn Hall on the main campus. I formulated this clay body for high temperature firings like we do in the wood kiln at the East 40; the real shocker, was that this clay body works at the medium range temperature used in the studio on campus! I won't go into the technical details here, but suffice it to say I was honestly shocked at how well this clay performed in an electric kiln at mid-range temperature! Ash glazes are supposed to show dramatic drips; the trick is, you don't want them to run off the pot. This test tile was photographed on its back because of sun glare, but it was standing up on vertical when fired in the kiln. The pleasant surprise was that all the variations of the ash glaze stayed up on the tile, none of them ran off the tile at the bottom which is a big problem with a lot of ash glazes. Many ash glazes can only be used at the top of the pot, they are so runny. This was the runniest variation, and even it didn't run off the tile. Long story short, we already have usable glazes based on the East 40 clay and wood ash, and they work great on the new clay body! Above is the simplest glaze recipe I tested-and my favorite result! The drips are less dramatic without the eggshell. It's such stable glaze that I can see using it on an entire pot, not just at the top for a drippy effect. The color comes primarily from whatever is in the East 40 clay, educated guess, a lot of iron.
Getting back to the vase at the top of this post, the dark part at the top is the same as the tile above, except there is an addition of copper oxide. The pot was first dipped in a glaze we had on hand from previous wood kiln firings, we wanted to see how it worked on the new clay body. The red you see, especially on the view to the right is actually from the copper-rich glaze I was testing at the top! All in all, we got lots of very helpful information from the test kiln firing. In all honesty, I didn't expect this much success in a first time at full-temperature firing!
0 Comments
Leave a Reply. |
Cindy VojnovicArtist & Educator Archives
September 2025
Categories
All
|


 RSS Feed