|
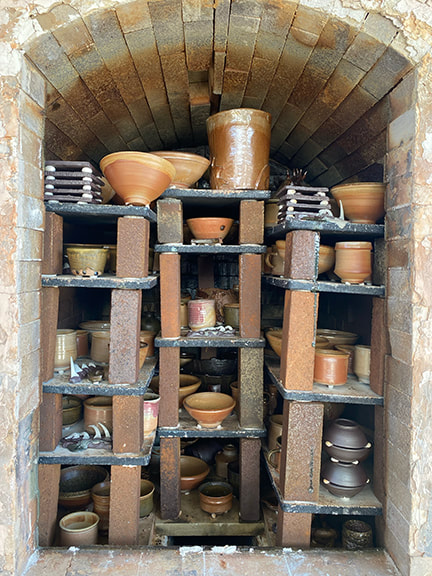
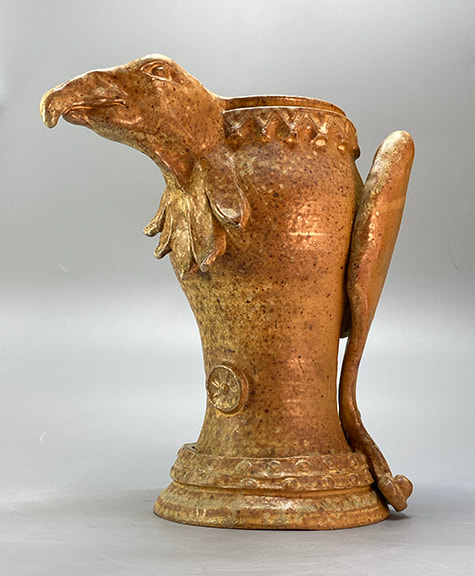
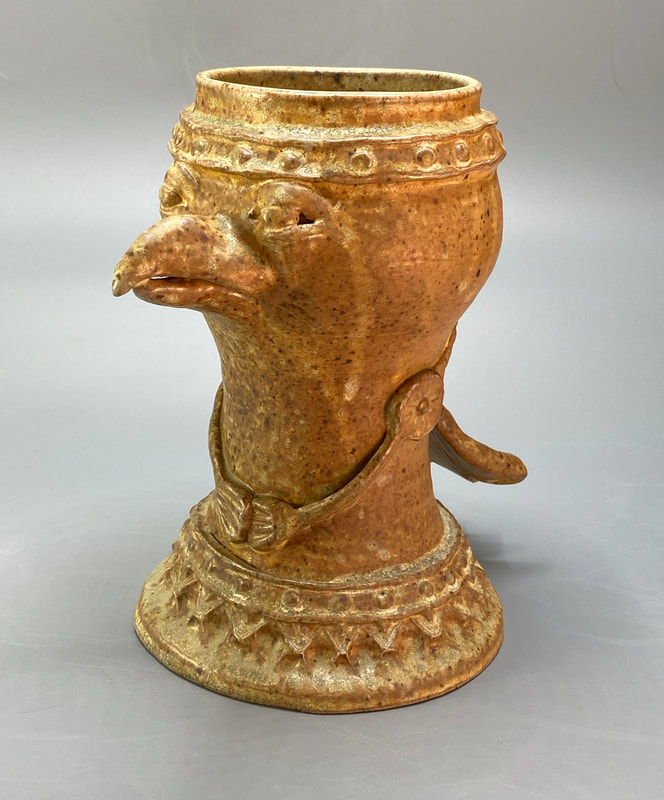
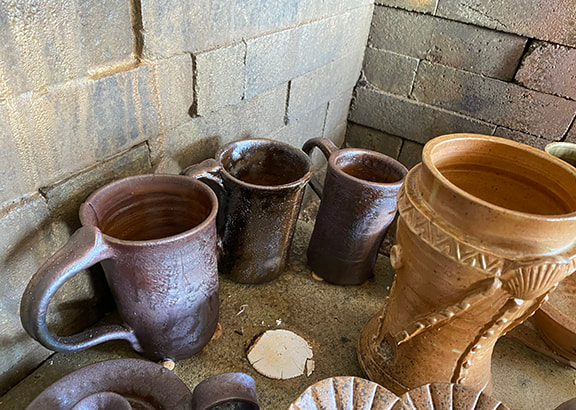
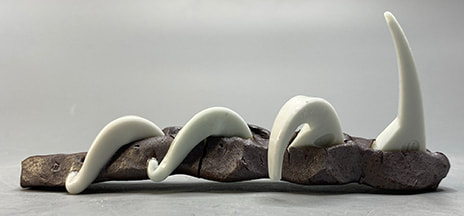
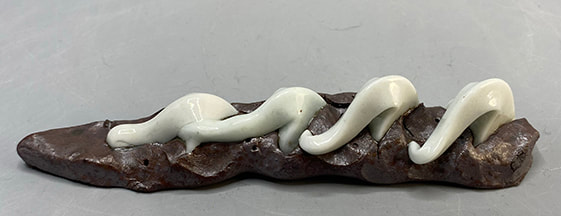
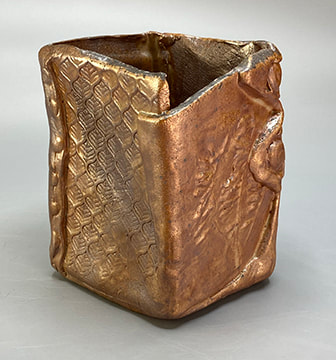
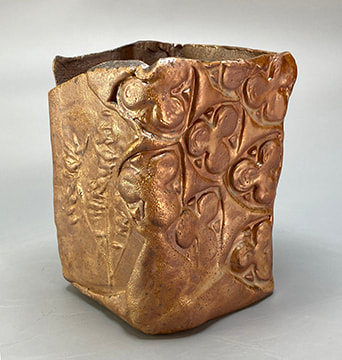
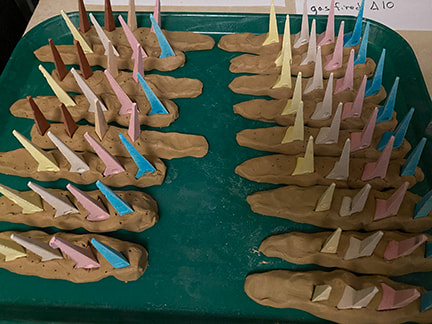
Opening up a wood kiln is like unwrapping Christmas presents-you may have an idea what to expect, on the other hand, you can get some real surprises! What I find the most strange, is how difficult it can be to figure out if the surprises are good or bad. It can take months, even a year or more to really “digest” the serendipitous effects off flame, wood ash and the myriad variables of the firing. I had two sculptural, medieval inspired vases in the kiln, both had a salt-white glaze, and came out weirdly brown speckled. My first response was yuck, not what I had hoped for-and not what I had got from the same clay and glaze combination in Previous wood firings in the same kiln! In fact, there was another vase in this firing, same clay, same glaze, but it was a re-fire from the previous firing. In that previous firing, there were parts of the kiln that just didn’t get hot enough to properly melt the glaze. But this time, that pot came out with a kind of lovely glow-I’m so glad I re-fired it. But what of the two speckle monsters? Hmmm. Not so sure about those, have to sleep on that for a few months. Then there were the mug re-fires. These were all made from “C Body” East 40 clay, and had been through a 6 day anagama firing this past October. They too must have been in cold spots in that firing, the glazes were rough and underfed. This is a clay I formulated less than a year ago, so I’m keenly interested in putting it to the test in every way possible. I had pieces in the Peter’s Valley anagama firing, in locations of the kiln that got up to cone 11 (the clay was formulated for cone 10) and there was no trouble at all. No flaws of any kind in the clay. There were also no flaws after the October 6 day anagama firing-but this re-fire kind of “fried” them, since they were located in parts of the kiln that overshot the firing range of this clay body. Let me explain. We used cone packs that had two cones below our target, (cones 8 & 9) our target cone (10) and a “guard” cone of 11. In the photos, the order from left to right is 8,9,10,11. In the first photo, you can see a perfect 10.The number 10 cone (third from left) is making a perfect arc, the tip down to the level of the base. There is daylight under the arc, as there should be. By contrast, the lower temp cones 8 & 9 are no longer an arc, they are a puddle, and cone 11 is only beginning to bend. In the second cone pack, there is no daylight anywhere under these cones, even cone 11 is a melted puddle on top of the clay that held the cones in place. What this means is that in that section of the kiln, we blew past our goal of cone 10, and because 11 is a puddle we must have actually hit cone 12. I found out the hard way the upper limit of the C body clay; it was fine at cone 11, but cone 12 was just too much. One of them cracked early enough in the firing that the glaze hadn’t melted yet, since, the glaze healed over the crack completely. Another had little bloat bubbles. The work had been over-fired enough to become so brittle that several of them had chips that broke off the bottom where there was no glaze to support the clay. To be fair, they were really close to the firebox, which hit at least two cones above our target, as explained above. And in spite of the flaws in some of them, others have no visible flaws and they certainly didn’t melt into a puddle or even slump, which can happen when a low-fire clay is high-fired. I fired an odd little piece I had done as a demo for texturing slabs, and making a draped form with visible slab joins from them. On the inside I sprayed on the East 40 ash glaze (that I formulated) in a fairly thin layer, and the outside was a combination of two different shinos and a salt white glaze and a little bit of the East 40 ash. For a little throwaway pot-I was going to just recycle the clay after the demo, but decided to keep it to just to experiment with glazes-I’m surprised at how good it looks.
In short, the work I cared most about-the medieval inspired vases-came out just whatever, while the piece that took me 10 minutes to make came out great. Or at least that’s what I think today. Maybe I’ll wake up in 6 months and have a totally different opinion. Please comment and let me know what you think!
0 Comments
Please note: these videos take a while to load. (Having technical problems and don't have enough hours to throw at solving them right now) The burn ban was finally lifted, and on December 18 we finally began the firing. The two anagama firings I did in August and October went on for 5-6 days; but this firing was scheduled to be completed in just over 24 hours. To get the work “fully cooked” meant that we had to actually reach higher temperatures in the kiln than would be the case if we were firing over many days. The cones behind the removable bricks were our only way we could be sure when the work in the kiln was fully “cooked.” The heatwork needed to achieve cone 10, our goal, is considered to be 2,381 degrees. That level of heatwork can be reached by more time at over 2,100 degrees, but for a one day firing we were going to need all 2,381 degrees to get cone 10 to bend over. Gabby Gentile and Connor McGaughran (my student worker at ESU) had been there since 2 in the afternoon, and stayed with me well past their points of exhaustion until after Dave Graham (Kiln Building Guru) was able to join me. With two fireboxes needing to be stoked every few minutes, this was a skeleton crew. It was after midnight that Gabby and Connor finally went home, and it was just Dave and I for the rest of the night, until the end of the firing the next morning. I took the left firebox, and Dave the right. It’s crazy how kilns have a personality, and how two fireboxes that should be identical, one right next to the other, can behave so differently. The left side of the kiln runs colder, the coals don’t burn down to ash fast enough, so the left firebox can get so choked with coals that it restricts the needed airflow on that side. How much, what size and what kind of wood to put in, and when, are decisions that are constantly being made. You don’t just chuck wood into the kiln and hope it works; this too is an art. Pine combusts faster, but doesn’t have the staying power of hard wood, it’s kind of like a sugar high, you either feed soft wood constantly or it can crash. Hard wood can actually make the temperature drop while it’s trying to combust. Likewise, the thinner the wood is cut, the faster it catches fire-and burns out. Getting the right mix of types and sizes of wood, how much room you leave open in the firebox, how often you stoke-all this has to be right, or the kiln will let you know. There’s a wonderful “roar” when a kiln is really hot, and it’s happily digesting just the right amount of wood. The night was beautiful. It would have been cold being out all night like that, but the kiln generated so much heat that being so close, I didn’t need most of the layers of clothing I had brought. The wind was going in the right direction, I think it actually helped us. Pyrometers that measure the air temperature in the kiln are not terribly accurate at the higher temperatures, but they do let us know if the kiln is getting hotter or cooler, which is critical information for figuring out when to stoke for example. As the kiln heats up, everything wants to expand. I’m glad Dave was there when one of the steel tie rods holding the kiln together popped under the pressure! Wow, that made me jump. He had just replaced the tie rod above the one that broke, and assured me it would be fine. You could see the other tie rods bow with the pressure the kiln was exerting as it expanded, but they held. Even if we hadn’t had the pyrometers, as in olden times, you can really tell when a kiln gets up to those higher temperatures well in excess of two thousand degrees! At 9 something in the morning, Cone 10 had made it’s perfect arc on the top right, and both cone 10 and 11 weirdly were bending together on the bottom left; we got to our goal. Once we reached our cone 10 goal, we stuffed the fireboxes as full as we could get them, then shut off all access of air to the kiln. Kilns go crazy when you do this! Any tiny sliver of space, around a brick, around a door, the flame tries to reach out, gasping for oxygen. That’s when you walk around the kiln-any gaps anywhere become really obvious with flame shooting out of them! The “door” of the kiln is temporary, rebuilt for every firing, so flames shooting out from there are not a problem. But if places that should be tight open up, this is when you find them. The fire just burns itself out, smothers-then you have to wait, and wait, for it to cool down. The bigger the kiln, the better insulated it is, the longer it takes. This post is already way too long, so you have to look at my next post for the unloading!
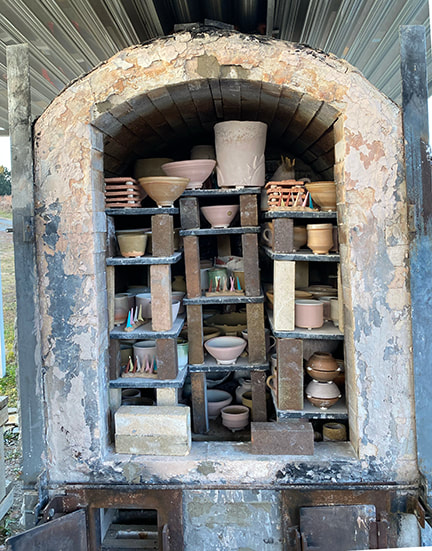
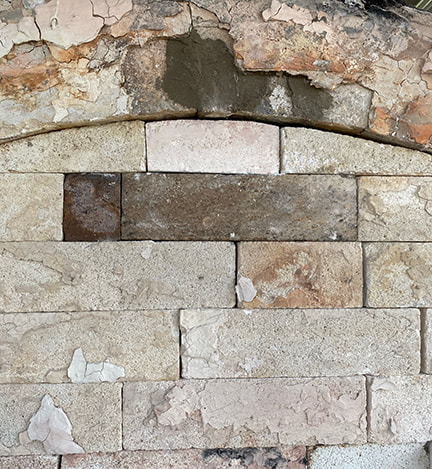
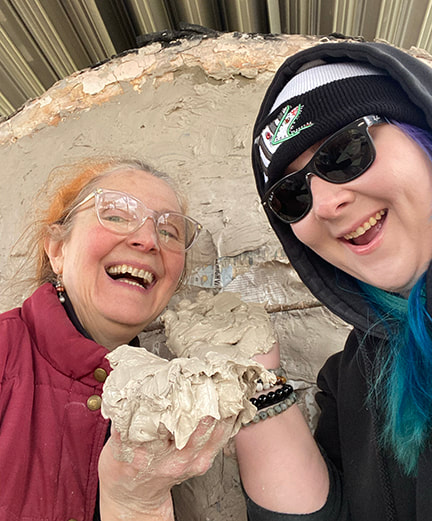
A delightful part of my part-time job as Manager of Ceramics at the Northampton Community College (NCC) East 40 is firing the wood kiln there! I had fired that kiln a number of times before, but for this Fall’s firing, I took on more of the work than in previous firings. I made the cone packs, for example, and made more of them than we had ever used in a single firing. Cones are scientifically formulated to bend over at very specific levels of “heatwork.” Heatwork is a matter of both time and temperature. The example I always give is lasagna. The oven may be 400 degrees, but if you only leave the lasagna in for five minutes, it’s not going to be cooked through! On the other hand, even if the oven is only 350 degrees, if you leave it in for 40 minutes it’s probably going to be fully cooked. Cones measure to what degree the ceramic is “cooked,” much like how a meat thermometer measures the temperature of the meat itself, not just the air in the oven. It was the first time I actually got to load a wood kiln, which takes a surprising amount of skill, not to mention hoisting really heavy silicon carbide shelves into place. All the hours I had spent watching others load wood kilns was invaluable. The idea is to understand how the flame moves through the kiln, and much like playing pool where one ball bounces off another, you want to bounce the flame onto all the pots, ideally send the flame everywhere, reaching every pot without restricting the path through the kiln. No pot can touch, or even get too close to touching, yet you have to do a kind of Jenga where you get as much work into the kiln as possible. The way ash moves through and lands on the work is another consideration. Suffice it to say it was an honor, and I was holding my breath that certain decisions I had made would work out! For example, Kelly Allen noted that no one had ever put the center shelves as far to the front as I had. Yikes! I was hoping for better flow through the kiln, more ash, but what if it just meant that the work closer to the front door didn’t get hot enough? Gulp. The door for the kiln gets built for every firing! First, the bricks. I actually really enjoyed custom fitting the last brick at the top of the arch, you can see it’s a lighter color than the bricks next to it. In previous firings we had done two bricks that stick out beyond the others, so you could remove them and see the cone packs strategically placed in the kiln for that purpose. For this firing, in addition to the two “peep” bricks, a third one with a hole in the middle was set up as a “blow hole.” Long story short, when flame is no longer coming out of the blowhole, you know it’s time to stoke. After the bricks were in place, Gabby Gentile (professor at NCC) and I “mudded” the door, which is pretty much like it sounds, although we used wet reclaim clay, not the kind of mud you have in a garden. Nothing like hands wet with “mud” in the winter. Then, for extra help so not so much heat escapes from the “door,” a special high-temperature cloth that looks like cotton but is not flammable, supported with a wire mesh was placed over the door. The pots were all loaded, the kiln was ready; but we had to leave it like that for weeks waiting for the burn ban to be lifted.
|
Cindy VojnovicArtist & Educator Archives
September 2025
Categories
All
|
 RSS Feed