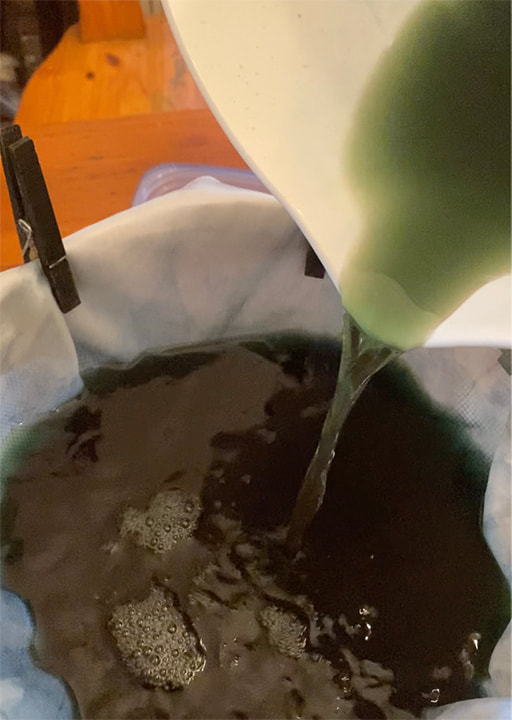
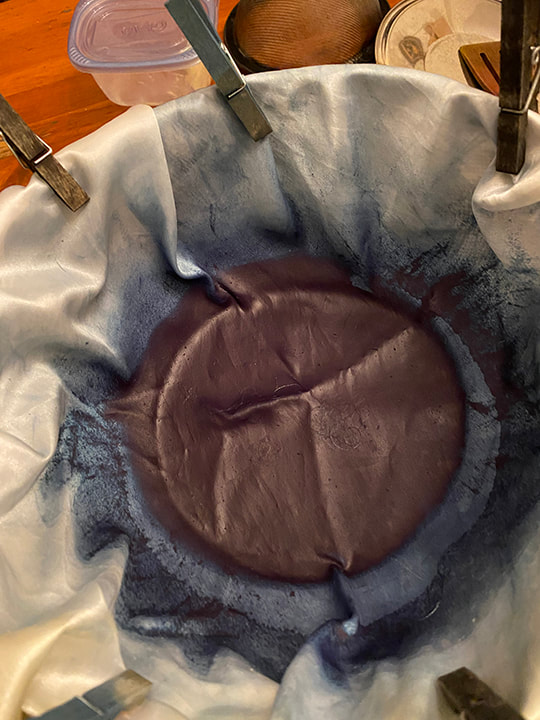
 Getting the yellow out; the yellow liquid that is not permanent goes through the cloth which is being used like a filter, but the blue woad pigment, which is a solid, gets captured in the cloth. I harvested more than on June 19, but I used about the same amount of water when I processed it. This led to a super-concentrated batch, which of course led to new discoveries. More on that later in the post.  Dipping the scarf in the woad after adding alkali but before introducing oxygen, which turns it from a dye to a (solid) pigment. I decided after adding the wood ash (to bring the PH up to 10) but before pouring it back and forth between the buckets (to oxygenate) to dye a bamboo rayon scarf. As is usual with both woad and indigo, when the vat is reduced (low oxygen) it’s a deep green, and so is the fabric when you first pull it out. But then when exposed to air (oxygen) it turns a true blue. In the case of fresh woad leaves like I was using, there is a significant amount of fugitive yellow in the leaves; and when I dyed the scarf, I had done nothing to get rid of that yellow. In any case-the scarf ended up a really lovely blue; so lovely it’s tempting to just keep it as is. But of course I’m curious about what if…I’ll get to that later. But now onto getting rid of the fugitive yellow.  At left, the color of the infusion after removing the leaves. At right, the same liquid after adding the alkali and exposing it to oxygen (by pouring it back and forth from one bucket to another.) After dyeing the scarf, I did the pouring back and forth to oxygenate the infusion of woad leaves (I had already taken the leaves out, it’s like making tea.) Woad and indigo are actually pigments, that is, a solid; dye penetrates fiber, indigo and woad coat the fiber. When I used a higher water-to-woad ratio to make the “tea,” (see my last post) the heavier, solid pigment sank to the bottom, and the yellow liquid could be scooped or siphoned off the top. But this batch was SO PIGMENT HEAVY that the pigment didn’t settle at all-even after sitting overnight! I just went ahead and tried to strain it; normally, again, the yellow goes through the cloth and the blue pigment gets trapped on top of the filter cloth. But the “waste” water after I strained the liquid (first photo at the top of this post) was not yellow-it was really dark. Obviously there was a lot of pigment left, so I strained the “waste” water a second time. Sure enough, this second straining captured plenty more pigment on top of the cloth. Doing a more concentrated batch seems to be a great way to avoid lifting larger, heavier buckets! However, it means that the pigment won’t settle, and has to be strained at least twice.  I’m kicking myself for not also dyeing a fabric swatch in addition to the scarf. That way I could cut the swatch in pieces, and try different stuff with the pieces to make comparisons. I wonder if next time I process woad, I gave the scarf an additional dip, if that would make the color deeper? I have this strange suspicion it wouldn’t do much! My reasoning is that there was SO MUCH pigment in that water, it was so concentrated, that the reason it didn’t go darker is chemical, not WOF (weight of fiber) to woad pigment ratio. So the second thing I want to do, is take some of the purified pigment, and reduce it again to make a dye vat, and then re-dye the scarf. My prediction is that without all the fugitive yellow still mixed in, the color of the fabric will go way deeper. Now I have to do another batch of woad, and put my theories to the test.
One last observation, woad is definitely a cut-and-come-again plant. The woad out at the NCC East 40 is happy that I’ve been persistently pulling the weeds to give it more room. Today-one day after I harvested the woad I’m showing in this post-you can’t even tell that I just harvested yesterday!
0 Comments
 From left to right, the woad after ph was brought up to 10 and the liquid aerated. It looks green at left because the woad pigment, which is a solid, has not settled to the bottom. The other photos moving to the right are as more of the pigment settled; at right, I'm removing the clear yellow liquid with a turkey baster. Last year I had a bunch of empty flower pots and thought what the heck, let me see what happens if I grow woad in a small flower pot in my backyard-which does not get great sun. I should have harvested it last year, since first year woad is what you’re supposed to harvest. It blooms and goes to seed in the second year. But my back yard woad never flowered this spring, and I was curious if it was even worth harvesting such a small amount of leaves-only 50 grams worth, even though I harvested every leaf from the 4 pots. (See this post for how I process the woad.) The reason I decided to make this post, is that I put it in glass jars and photographed one of them as the woad pigment settled to the bottom of the jar. It’s just a good visual for that part of the process. In the last photo on the right above, I’m removing the yellow liquid with a turkey baster. The yellow is not a dye, it’s very fugitive and needs to get separated from the nice blue pigment.  These are the flower pots of woad that I grew in my backyard. Results? Quite good! Not much quantity, because I had so few leaves, but especially for second year woad which isn’t supposed to work, it was a very rich, intense color. It was so close in quality to my last batch, that I just added what I got from this batch to that one. (My last batch was pictured in this post.woad-over-weeds-at-least-a-momentary-victory.html)
 Woad in the bucket, after adding water soaked in wood ash, and before straining and drying into a powder It’s a constant battle to pull out the weeds in my woad bed, to give the woad some room to grow. Woad-which has the most active ingredient (indigotin) we need for both dye and pigment-is harvested from first-year plants which grow very close to the ground. The local weeds jump up quickly, leaving the woad literally in their shadow. This past week I pulled wheelbarrows full of weeds out of the woad bed, and the woad responded almost in front of my eyes, I swear the woad was visibly more abundant by the end of the week. Tired as I was yesterday, I wanted to capitalize on this temporary moment of victory-so I harvested some woad. 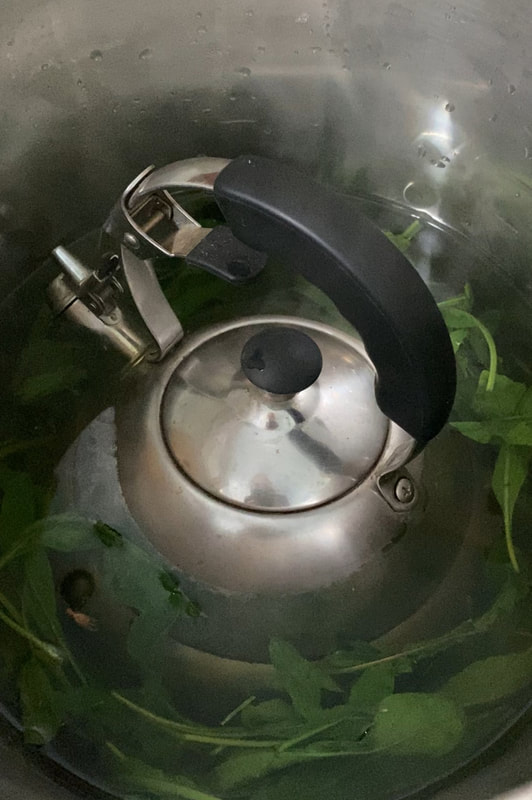 The weird thing was just how easy it seemed. I would compare it to making dinner; it took effort, yes, but it wasn’t like it sucked up the whole day, just one smallish part of a normal day. (If you want to see the whole process, reference this blog post.not-what-youre-supposed-to-harvest-in-october.html) I used less than 500 grams (about a pound) of fresh woad leaves. The first step is like making tea; you don’t boil the leaves, you pour the water onto the leaves and let them steep. You’re supposed to weight the leaves down, so they are surrounded by water during the steeping; I’ve used bricks inside of tupperware and all kinds of crazy things to try to do this, but last night’s innovation was I just stuck my tea kettle (with water in it for weight) on top and it was so easy! The kettle of course has a handle, so it was easy to lift the kettle and stir occasionally. O.K., not exactly earth-shattering but when you do something enough times, all these little discoveries and refinements help to streamline the process, and make it easier.  Left, sample from old batch, right, sample from yesterday's batch! The one on left started out green; even though it's losing the fugitive yellow from sun exposure, it's still much lighter, not as concentrated/has more impurities than yesterday's batch at right. I got a good yield of super-dark, rich pigment. (See right above) Once I dry the pigment into powder, I like to put each batch into its own little jar. I can compare the color of batch to batch that way, and this batch was definitely top-notch. For comparison, once I did a huge batch, and just didn’t have the patience to wash/strain out all the (non permanent) yellow from the liquid, long story short. I just dried the slurry as-was, and it was a lighter, kind of greenish blue, not the “true blue” that I just got in this smaller batch. So, I put the powder in a nice transparent glass jar and have kept it in the sunniest window in my house. The blue woad pigment is permanent, the yellow not permanent. In the 2 years that the pigment from that batch has been in my window, it has become increasingly blue! I would be wary of using that batch for a painting that I want to last indefinitely, but it was a fun experiment. Even after two years though, it’s not as good as the much more pure batch I made yesterday. Moral of the story I think, is make more small, easy to do batches.
What I’ve read is that Woad should be planted in March, and harvested at its peak in July. Well, I din’t plant this year until June and July, and didn’t have a chance to harvest until this week, in mid-October. I was able to draw on all my experience. First, I only bothered with the best leaves. The new, not so big and not so small deep green ones. I ignored the temptation of those huge leaves-by the time they get that big, I have discovered through eco-prints (see my Where is the Woad post) that they don’t have enough pigment to bother with them. I didn’t pick that much, because I wanted to try one new thing-a different source of alkali, namely water soaked in the wood ash from the NCC East 40 kiln. I soaked the ash nearly a year ago, and wasn’t sure if it would lose any of its power in that time. There were so few leaves they looked lonely in the bottom of my smallest dye pot. But they yielded enough pigment to show that the leaves have plenty of pigment in them right now-and that I've got my process worked out. Here’s a summary of the process:
Where is the woad pigment in the plant? The pat answer I’ve heard is “in the leaves.” Not always, I just discovered. In one of the Michel Garcia DVD’s I bought, he makes prints from woad by simply mashing the leaves into cloth with a hammer. He then washed the cloth with a neutral dishwashing liquid (Dawn) and the non-permanent green washed out, leaving a print where the blue pigment was visible. I tried it, and realized the implications almost immediately. The pigment isn’t where I thought it was. I had been harvesting the huge outer leaves, with the idea to give the new leaves room to grow. While that pruning approach worked to make the plants grow like weeds, I had a hard time getting pigment. Here’s that first print. 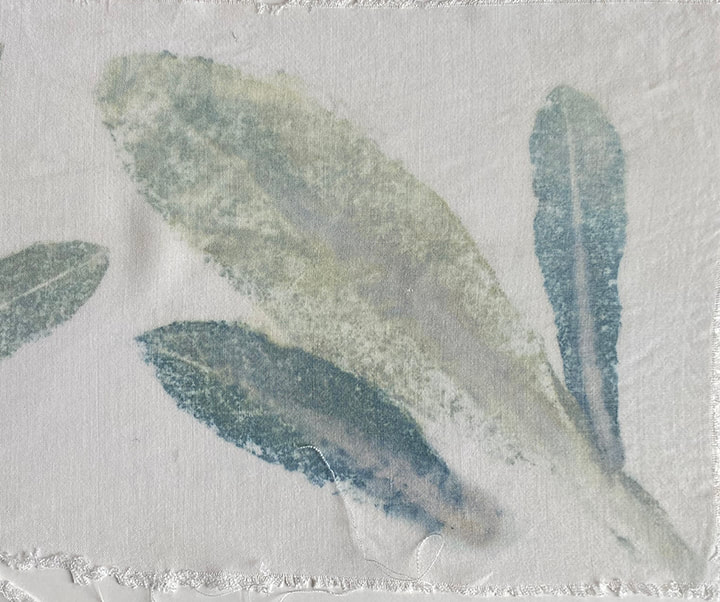 You can see, that the blue is NOT in the big leaves or the stems-there are only the faintest traces of blue in the big leaves. In fact, another print made at the same time as this one, was left outside in the sun and rain. The green vanished completely, but the blue stayed. The blue-the desirable pigment we get from woad-is very stable over centuries, as the Unicorn Tapestries etc. clearly show. The other stuff in the woad “goes away” with the action of water and sun-and that is something I was able to put to good use, more on that later. The point is, the light green you see in the photo above is NOT the pigment, and will vanish. The blue is what I’m looking for. And I didn’t find it in the big leaves-it was far more concentrated in the small leaves! I want to do these woad leave prints on a regular basis to track where the pigment is-and when. On February 14 this year (2023) I made another print. I made the print in a slightly different way, so as not to use up so much of the bamboo rayon fabric; instead of folding the fabric in half and the leaves in the middle, I put paper on one side and fabric on the other. I also used a smoother surface underneath them, with the idea of not losing any of the print to the “valleys” of the concrete block I had used for the first print. The cloth side was blurry and harder to see than the paper side, so in the photo below you see the leaves arranged on top, and the print on the paper below. The print wasn’t as good overall as the one from summer, so maybe the rough concrete block was better? 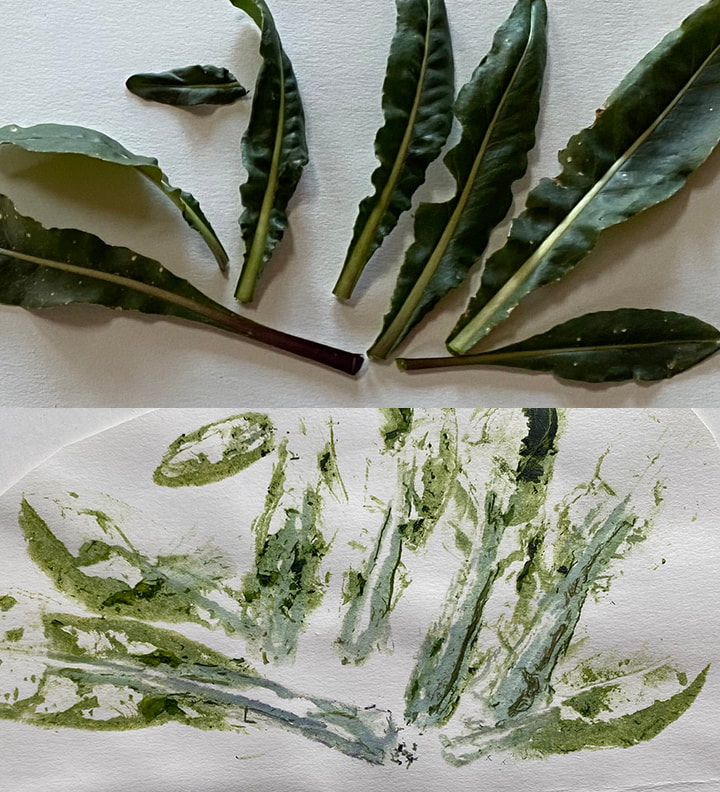 Another surprise-the pigment had left the leaves, but was now in the stems! In summer, it was the opposite. Not only that, it was the larger leaves with the thicker stems that had the pigment, not the smaller leaves. So apparently in the colder weather, while the woad does not go brown and dormant or die like most plants here in Pennsylvania over the winter, the pigment in the plant moves around. So if I want to harvest pigment in winter, do what I mistakenly did in summer, and use the larger leaves! Interesting. I had heard that once the plant looks purple, the pigment is destroyed. Yesterday I picked a selection that was purple in various places. Since I was at home and didn’t have a concrete block, I used one of the concrete steps to my house. The result was terrible, sorry, it makes the photo very hard to “read.” But if you look closely enough, there is no real blue, only purple and green, both of which are fugitive. Every source says the purple leaves are ruined for pigment production, and my own test confirms this. 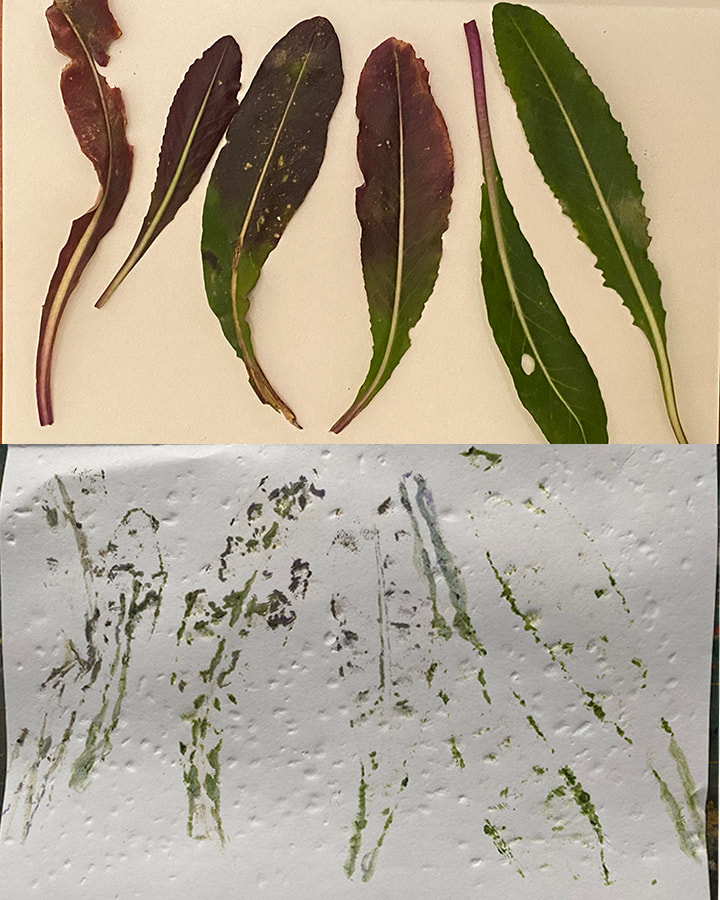 My residency at the NCC East 40 began on June 1, so I didn’t get to plant the woad until a few days into June last year. This year I plan to sow in March as is considered optimum. Woad needs wet to germinate, and isn’t much bothered by cold. That’s next month! Now that I have the eco-print test (mashing the plant onto cloth and/or paper) I plan to do it both on the 2023 crop and the 2022 crop, to see how much pigment is where when! This will give me much more specific information than I have been able to find in any source.
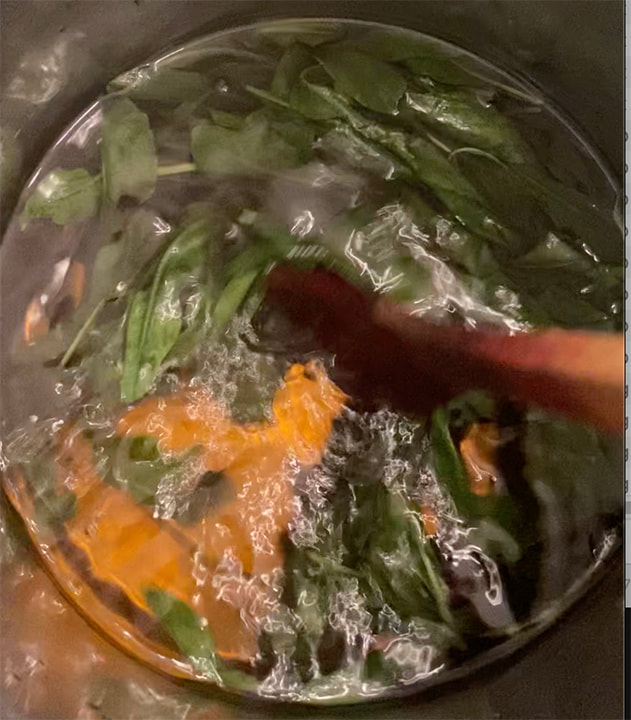
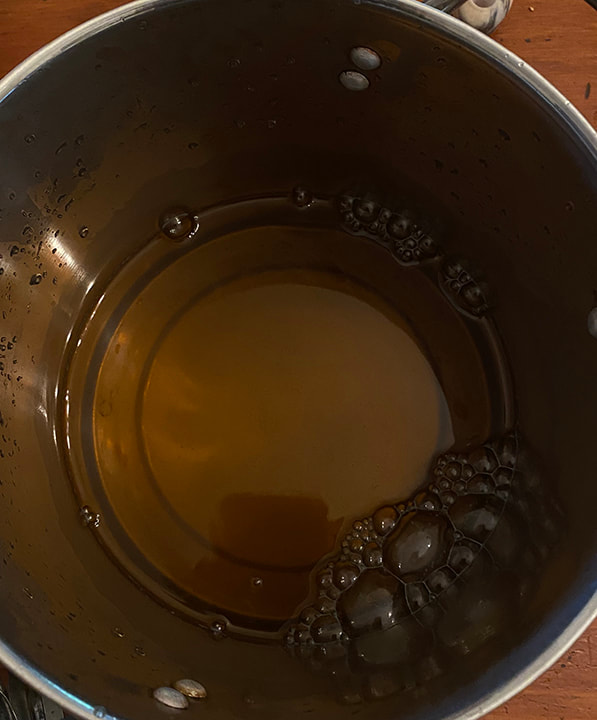
Finally, there was another huge “Aha!” moment that I had inspired from the eco-print process; I can use sunlight as well as water to help get rid of the impurities. Last summer I was processing a large batch of woad leaves that I later learned low pigment content from doing that first eco print. I could tell there was pigment, but there was also a lot of the fugitive yellow that I needed to get out. I did what Garcia showed in his DVD, which is to wash the pigment. You use a fine mesh cloth to catch the pigment, but the fugitive yellow is soluble in water and gets washed through. Every time I rinsed, the pigment got less green looking (from the fugitive yellow) and more blue. But after a half-dozen washings, and all that waiting for the liquid to go through the cloth to the bucket below, I got frankly tired of my kitchen being a mass of buckets and strainers. I dried out the pigment, put it in glass, and put it in the window that gets the most sun. I shake up the little jar periodically, and it continues to improve, at this point I’ve actually used a little in in some paintings. Now that the eco prints are helping me to understand what to harvest when, I won’t have to deal with such an annoying batch again! 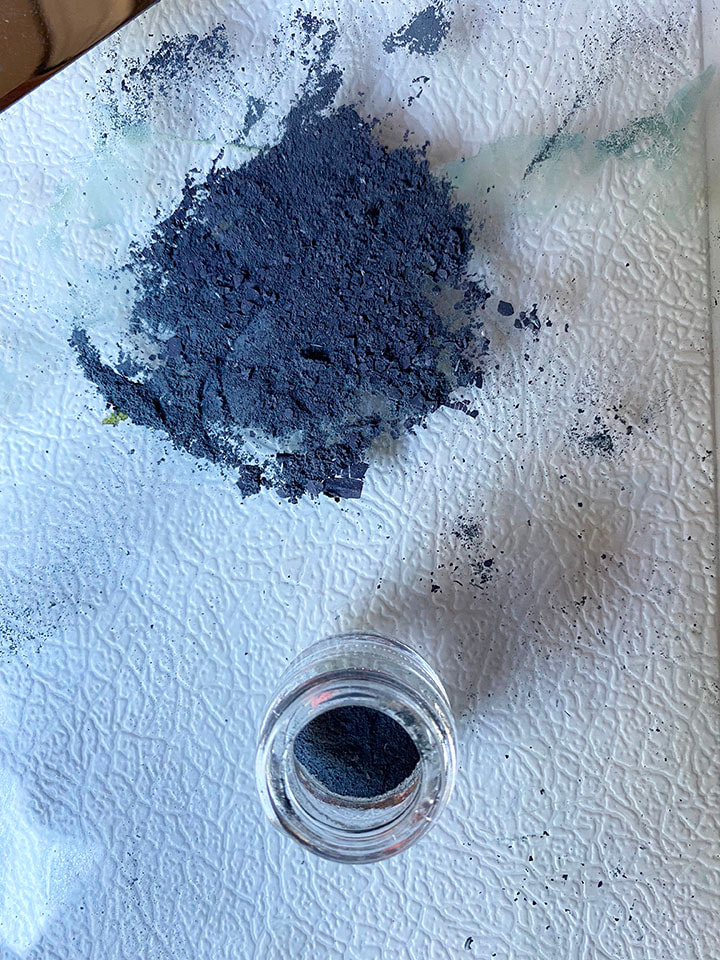 This is the finished woad pigment I made on the last day of my NCC East 40 residency. I planted woad the first day of my 2022 summer residency, see the mother woad, and made another post about the woad balls I made, which preserve the leaves for use in later dye pots. Woad also has a long history as a pigment, for example in the Très Riches Heures du Duc de Berry, so I was keen to harvest some of the woad I planted, which is already in peak harvest season. In fact, if you don’t harvest the woad, the leaves underneath don’t get enough light and air and shrivel up and die. Woad likes to get harvested every week or two in peak season, and just grows back vigorously. 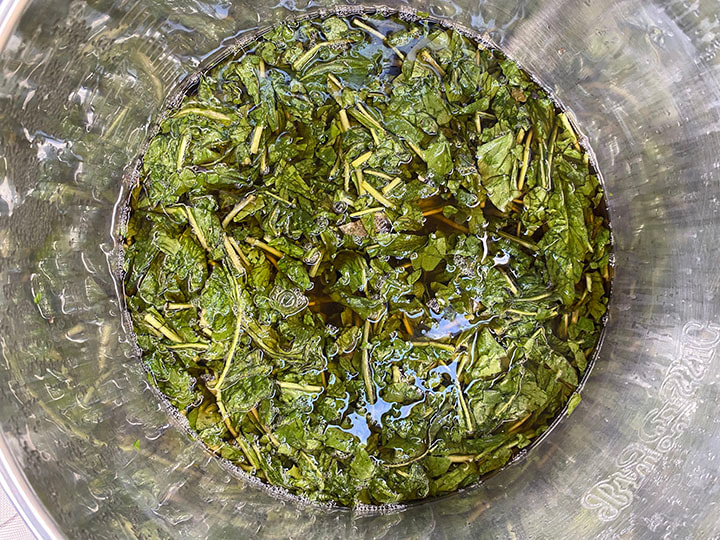 Soaking the woad leaves in hot water-if you look closely you can see the water has turned "sherry colored" The extraction process for all indigo-containing plants is similar, so I re-watched a DVD from Michel Garcia where he extracts pigment from fresh Indigo leaves in Mexico. I jotted down the steps in my notebook and headed out to the East 40 where I picked two buckets full of woad. The first step is to pour hot water over the leaves, hot water not more than 120 degrees F. A problem I have with the propane stove, is I can’t effectively keep something at a constant temperature. Hot as it was on Monday, it wasn’t 120 degrees so I knew the pot would cool somewhat, so I started with the water at 120 degrees but then let it soak for 3 hours instead of 2 which would have been enough if I could keep it up to that temperature. The second step after soaking in hot water, is to strain out the leaves; after soaking, all the active ingredient is in the water, but it has to be further processed to bring out the pigment and discard the rest. At this point, the water is green-the blue indigo pigment isn’t formed, it is chemically not indigo yet, but rather the indigo precursor indigotin. Long story short, in the DVD the indigo at this stage was green, but I knew from doing woad dye pots that woad is “sherry colored” (essentially a brownish red) at this point. So far so good.  Pouring back and forth introduces oxygen. This was actually the later successful attempt; you can see the foam is blue. The next step is oxygenating, and bringing the PH up to 9 with Pickling lime. That’s when you should start to see a blue froth, and if you oxygenate long enough, the froth goes away and then you let it settle for a couple hours, and the pigment sinks to the bottom. Or at least that’s how it’s supposed to work. Spoiler alert, spectacular failure is in the title of this blog post. 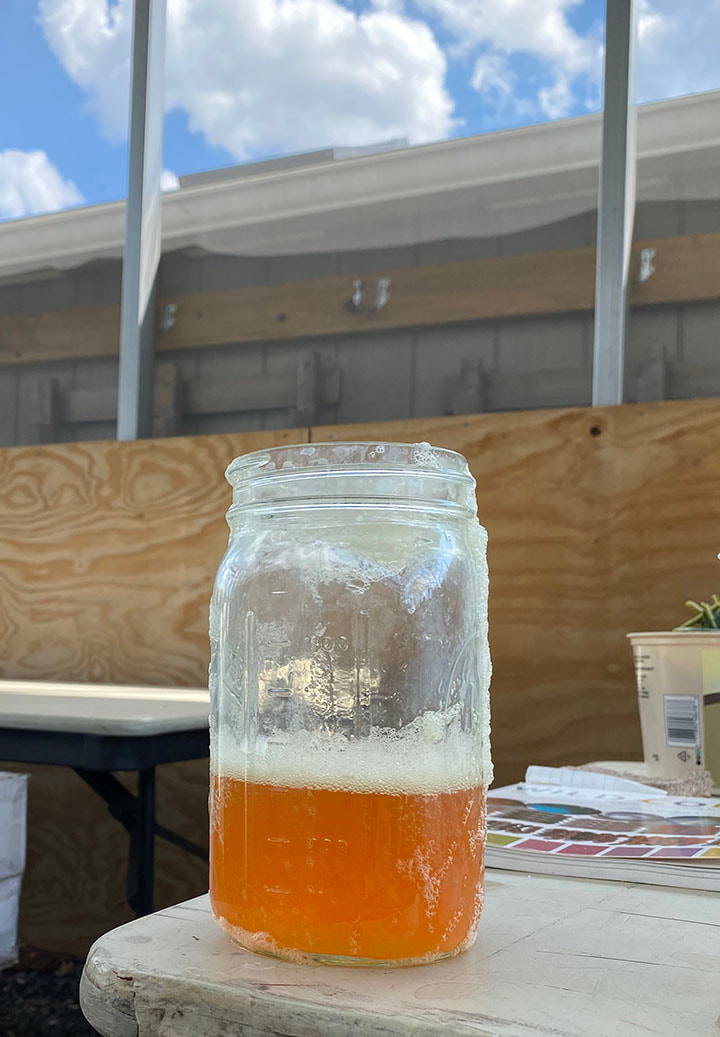 Spectacular failure. The opposite color from what it should have been! My liquid turned bright orange, no matter how much I oxygenated, and boy did I oxygenate. Zero pigment formed. Undeterred, I went home and bought streaming access to the first Michel Garcia dye workshop-the only one that I didn’t own because I couldn’t buy it as a DVD. In the first workshop, he used woad, not indigo. The steeping time for the leaves in the hot water is 15 minutes for woad, not 2-3 hours. Oops. The next day, August 9. was the last day of my residency, and I went out to the garden and picked more woad. Since I had harvested so much the previous day, and had such a spectacular failure and wasted all of it, I only picked a fraction of the amount from the day before. I took comfort at how fast woad grows, and that I could tinker with smaller batches until I got it right. 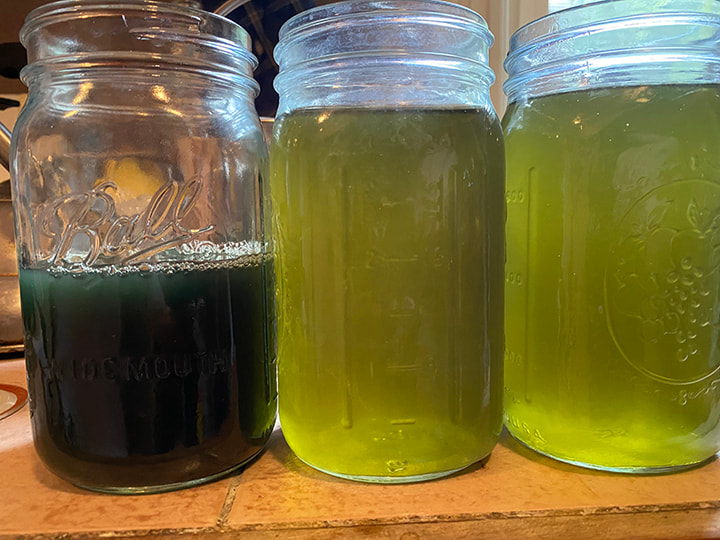 The two jars on right are the "juice" that was taken off the top of the pot. At left, this is from closer to the bottom of the pot, you can see the blue pigment suspended in the water. I had to wait for this to settle more before filtering. 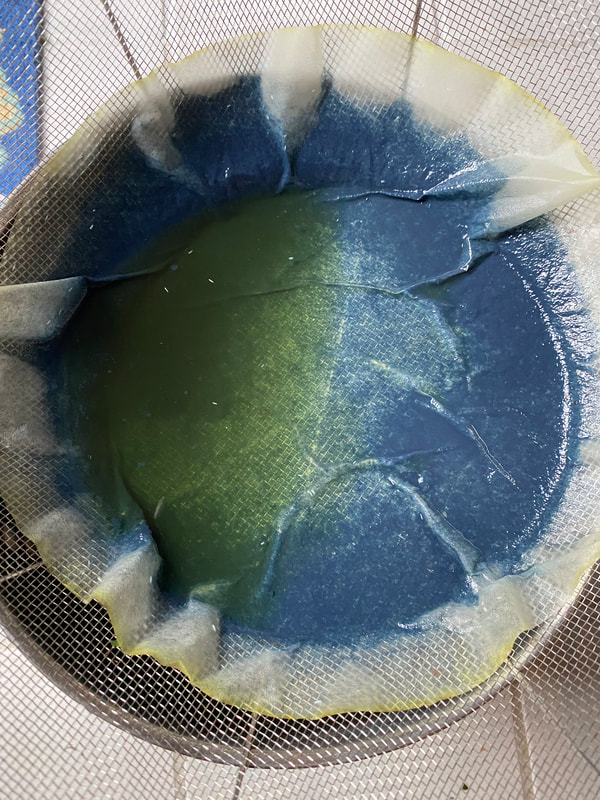 Here you can see the green juice that will eventually sink through the filter, and the blue pigment that the filter is keeping on top. I did the whole process again, et voila! The water I strained off wasn’t yellow like it was supposed to be, it was bright green. But after the soaking, oxygenating, pickling lime and letting it settle, there was indeed a gorgeous blue pigment! I scraped the pigment onto a sheet of glass so that any remaining water around the solid pigment particles would simply evaporate. The next day I scraped the dried powder off of the glass and put it in a little jar. The powdered pigment will last for literally thousands of years, it does not fade or change, and you can add whatever binder you want to make whatever paint you want. For egg tempera, all you have to do is mix together some of the dried pigment and egg yolk and you’ve got paint, and you make only what you can use that day, so that was the first paint I made with my brand-new woad pigment! 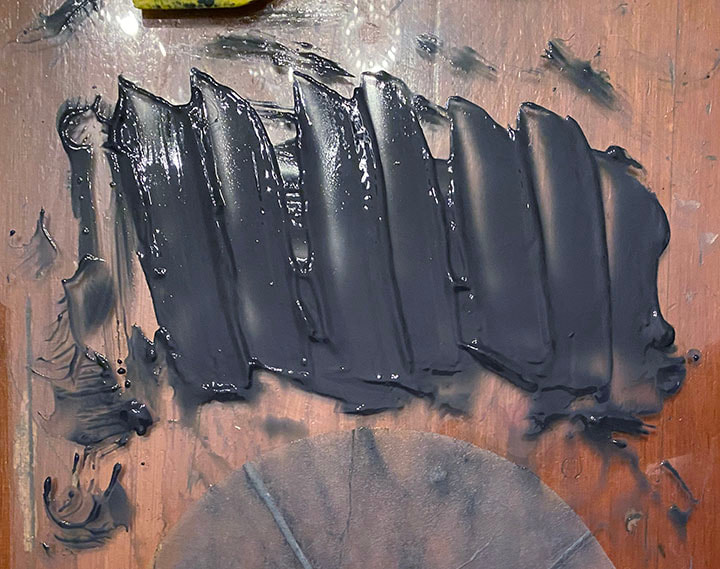 Here is the wet pigment on the glass, right after it was scraped off the filter. The first photo at the top of the post is actually the finished pigment after it dried and I started putting it into the jar. I didn’t mind my spectacular failure. The more ways you do something wrong, the more you get to understand what matters and what doesn’t in a process. Before GPS, I would go somewhere according to a set of directions. If there was construction, or I made a wrong turn, I had no idea where I was. Because all I knew was the one way. But the more I got lost, the better I got to know the area. A lot of things are like that. Spectacular failure, or even not-so-spectacular failures, can lead to better understanding, and yes, success.
|
Cindy VojnovicArtist & Educator Archives
September 2025
Categories
All
|

 RSS Feed