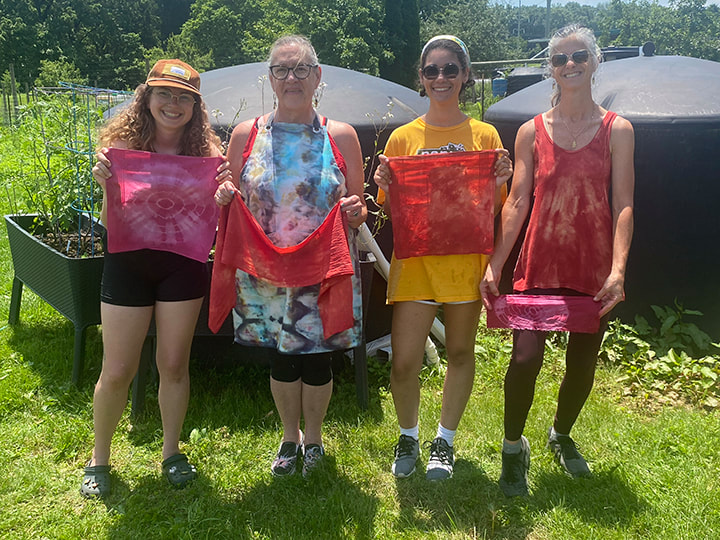
 When I began working with natural dyes, I wanted the intense earthy madder root reds I saw in the dye books. But alas, my attempts on cotton were an endless source of frustration and (to me) unsatisfying PINKS, not REDS. Preparing fiber for natural dyes is a protracted and somewhat arduous process. No matter if the fiber is brand new or not, it has to be “scoured” at about 165 degrees with a neutral soap and soda ash for an hour. After that, it has to be thoroughly rinsed. Then the fiber has to be mordanted, aluminum acetate for vegetable fiber such as cotton, alum and cream of tartar for animal fiber such as wool. The fiber sits in a hot bath of the appropriate mordant solution overnight, then once again has to be thoroughly rinsed. But no, that’s not all. The fiber has to be completely dried at this point and after that dipped in a solution of calcium carbonate and rinsed yet again. Adding another step to this fiber prep routine wasn’t at the top of my list of things I wanted to do. But I was so determined to get a good red, that I got ground oak gall and inserted yet another step in the process, pre-mordanting. This involves another hour of simmering (in the oak gall solution) and then, you guessed it, yet another round of rinsing. This pre-mordanting is inserted in-between the scouring and the mordanting. I scoured, pre-mordanted, mordanted and calcium carbonate dunked cotton fabric before dyeing with madder root. It worked. Eureka-bing bing bing!!! At long last, I was able to achieve the deep red that I had always dreamed of on cotton. (Wool is much more agreeable to taking up dye, and I first achieved a good red on wool.) 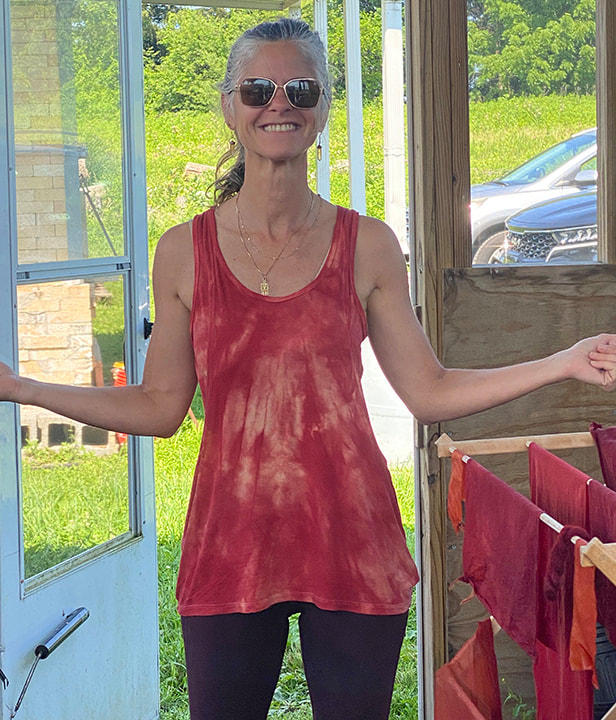 Jen Kimock with a her madder-dyed shirt This year, when I did the Intro to Natural Dyes and fiber prep class, I pre-mordanted with the oak galls. That set the stage for the Reds dye class a few weeks later. To be honest, I had only done tests with the oak gall pre-mordant thing, I had never pre-mordanted with oak galls at a bigger scale. I knew it would work, because I had tested it. But what I didn’t realize, was how much less of the madder root I could get away with using fabrics that got the royal pre-treatment, so to speak, with the oak gall pre-mordanting. The books say for madder that to get an intense red you use as much madder, by weight, as the fabric-a 1:1 ratio, or even madder up to twice the weight of the fabric. The big surprise from this year’s class is just how much the pre-mordant jacked up the power of the dye. We got a really strong red so fast! In the past to get that good a red, I would have to keep the fabric in the dye pot for a week, heating it up again every day. I could have probably used half the weight of madder in proportion to fiber, the pre-mordanting jacked up the color response so much. So the bad news was I used way more (expensive) madder root than I probably needed to. The good news was, the results were great. 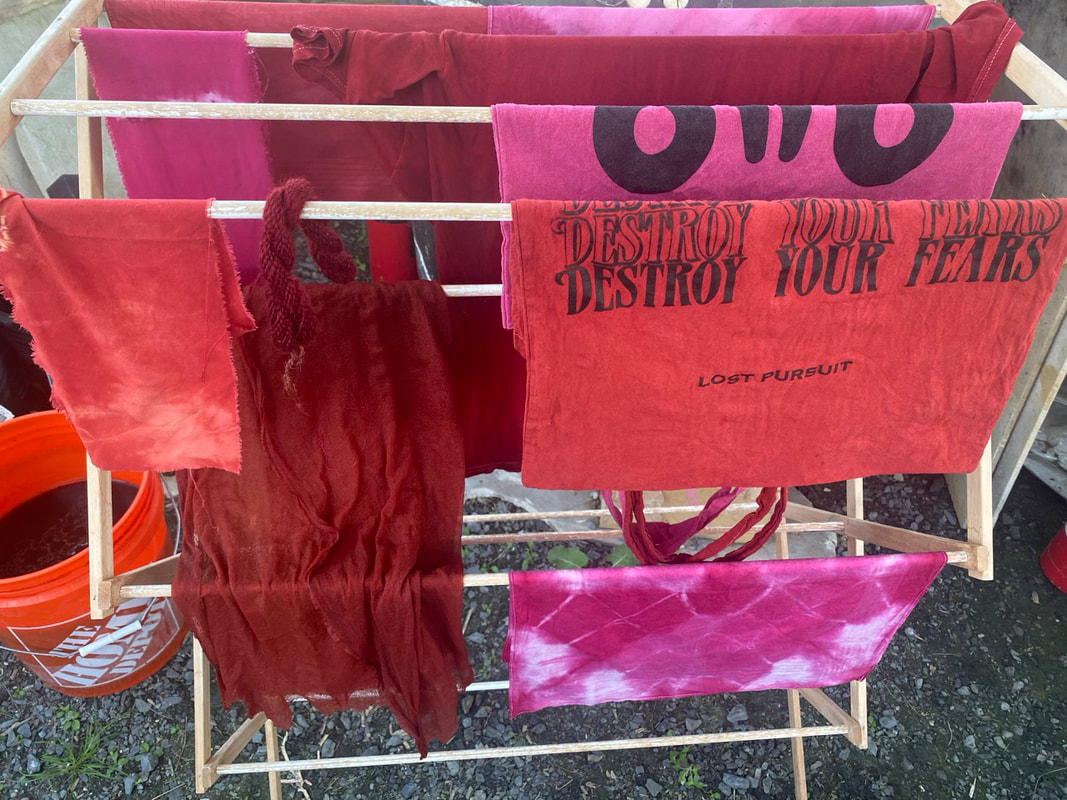 Drying rack with an array of reds from madder root and cochineal beetle natural dyes Cochineal (a South American beetle that grows on prickly pear cactus) was the dye we used on the second day of the workshop. Madder root tends towards the warm side, while cochineal tends towards the cool, magenta/purple side of red. The second day of the workshop, we used cochineal. Many natural dyes take a lot of time and “coaxing”, but cochineal is relatively dramatic and fast. Cochineal can be overdyed on top of madder to get the kind of red you envision from a box of crayons. By its self, cochineal can seem more magenta pink or purple-ish red; or so I thought. In the “goody bag” of prepared fabrics that each student in the workshop received, was a piece of bamboo rayon. (The goody bag also included a cotton bandana, bamboo rayon scarf, wool and a strip of silk charmeuse.) One of these pieces of bamboo rayon by mistake didn’t get taken out of the dye pot until the day after the workshop. The fabric had been tie dyed, and in the sections that were free to absorb dye overnight, the color was far deeper than I am used to seeing with cochineal. I’m not sure if that is due to the length of time in the dye pot, the pre-mordanting with oak gall, or some combination of the two. 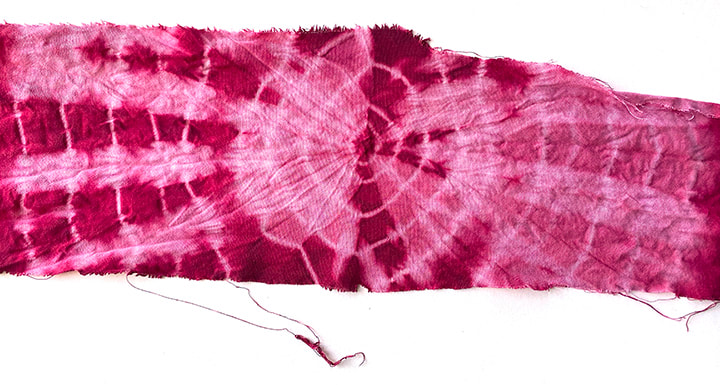 One thing about natural dyes, is there is no end to what you can learn. There are just so many variables that affect the outcome, that the possibilities are endless. This year’s reds class was particularly satisfying! After all the struggles (and failures) I had attempting to get strong reds, this year’s class was a breath of fresh air. It was the only class this year that wasn’t filled to capacity, but the students were so wonderful that it was totally fine.
0 Comments
@ Book and Puppet March 15 – June 7 2025 Loom raising 5-8 Friday March 28 Reception 3-6 p.m. Saturday April 26 This coming week I am going to be hanging a solo exhibition” curated by Arta Brito that brings together my recent work from the past few years, the fiber, painting and ceramic. I was so happy that Arta could see the connection between growing plants to dye recycled fabric and make paints, for example, with making clay and ceramic glazes from local materials. I’m literally going to the earth for my materials, and participating in historical, even ancient forms of making. In a world that is becoming ever more virtual and artificial, I hope people can enjoy the “grounding” of this work when viewing it as much as I felt when making it. The fixed parts of the show will be up by March 15, available for viewing during all of Book & Puppet’s regular hours. There will be a “loom raising” event on Friday March 28, the public is invited to come and help me construct a warp-weighted loom in the gallery! I will demonstrate how I take old bed sheets, clothing etc. and turn them into cord or “t-shirt yarn” that can be used for weaving. I’m going to use the loom and naturally dyed, repurposed fiber to do a weaving on this loom over the course of the exhibition. This show will have the finished 27 foot weaving that I made on the loom I built in the East Stroudsburg University Madelon Powers Gallery for my 2021 solo exhibition there. (See photo below.)  Before I did the warp weighted loom, I used a pin loom to “sketch” in the same naturally dyed, reclaimed fibers I eventually used in the warp-weighted loom. These modules were the models for the large paintings I made-on repurposed, reclaimed fabric of course-that are also in the exhibition. Since the modules are small, they can “dance” around the exhibition space, there are two dozen of them, see if you can find them all!  While dyeing the fabric, I was kind of gob-smacked to learn that some of the pigments that I had been painting with for decades were originally made using leftover dye baths! I took a deep dive into making my own pigments, and paint during my residency at the NCC East 40. I did a series of imaginary landscapes on clay panels I made, where ALL of the colors were paints I had made from pigments I processed. This show will include most of these imaginary landscapes. So for example you can see weavings that include fiber dyed with madder root, and paintings that use paint made from the leftovers of the dye bath used to dye that fiber in the same show. These natural landscapes also include paints made from clay dug from the NCC East 40, and ceramic works made utilizing that same clay. The ceramic works are the most recent, except of course for the weaving that will be performed over the course of the show.
A through-line and progression here are the materials-from the earth-that are used in all the work.
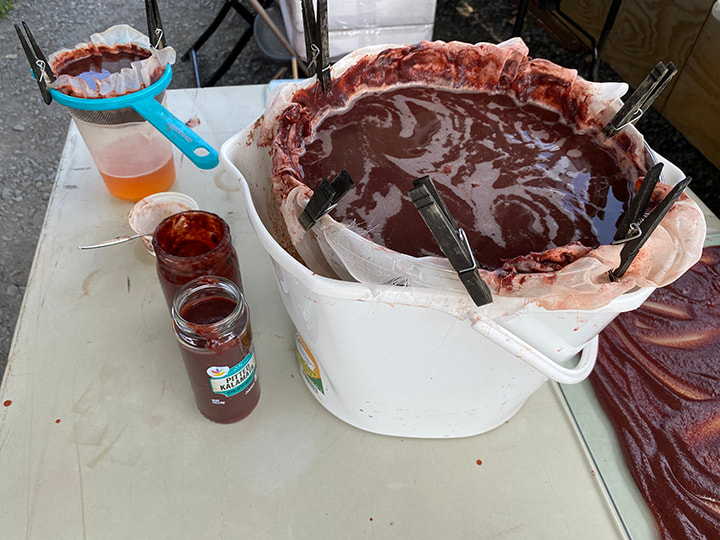
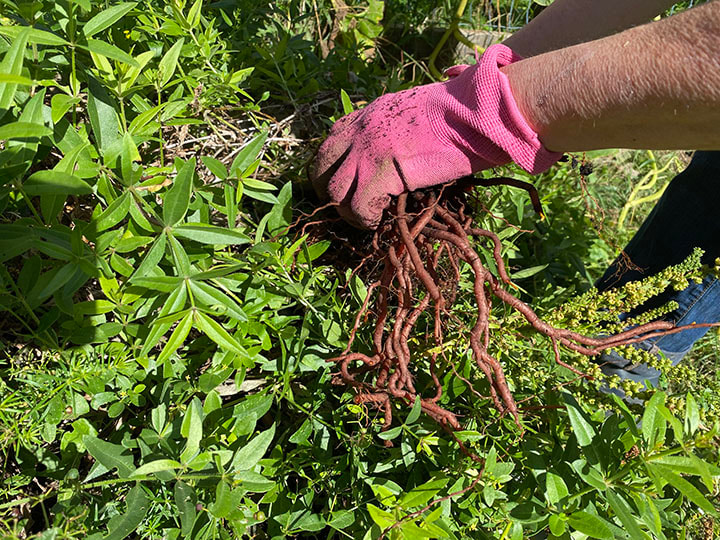 Here most of what you see is the madder plant, great friend Marla Kittler who planted a dye garden for me pulling up some of the roots for the first madder harvest years in the making, and a little weld (another classic dye plant) blooming in the lower right. Doing a madder dye pot is something of a long term commitment! There is so much you can get out of it, if you do everything just right. Madder is a plant, the dye color comes from the root, and you can’t harvest the root until the plant is at least 3 years old. 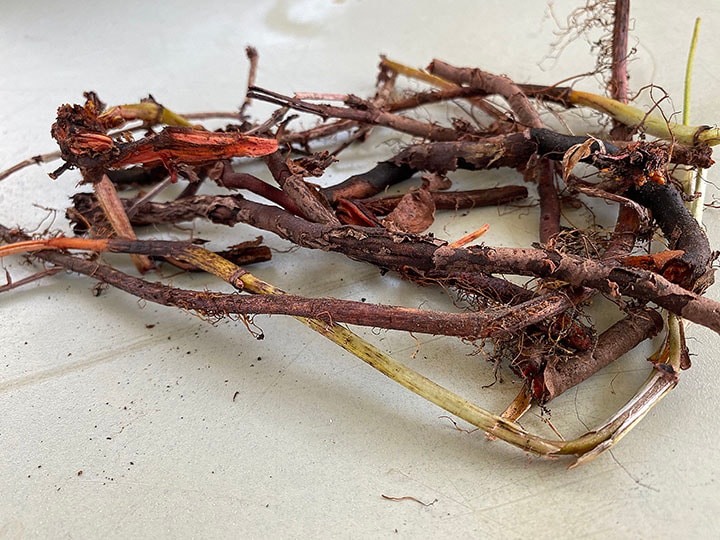 Here is some madder root I harvested this summer from Marla's dye garden. To be transparent, I haven't processed this homegrown root yet, the dye bath in this post was made with older, purchased madder root. The root from the madder plant can make my favorite color in the world-a rich, warm dark red. Madder can also make orange, pink-or brown if the temperature gets too high. The leftovers from the dye bath can be precipitated into a solid pigment (see my 4/29/22 post “Don’t Jump in this Lake”) from which can be made pretty much any kind of paint-oil, watercolor, gouache, pastel, egg tempera etc. The ancient Egyptians used it, the Greeks and Romans used it, it was very popular in the middle ages, Renaissance…and some version of “Madder Lake” or “Rose Madder” has been in my paint box from when I started painting many moons ago until now. All of the above-from antiquity to me-used madder both to dye fiber/fabric and to make paint. 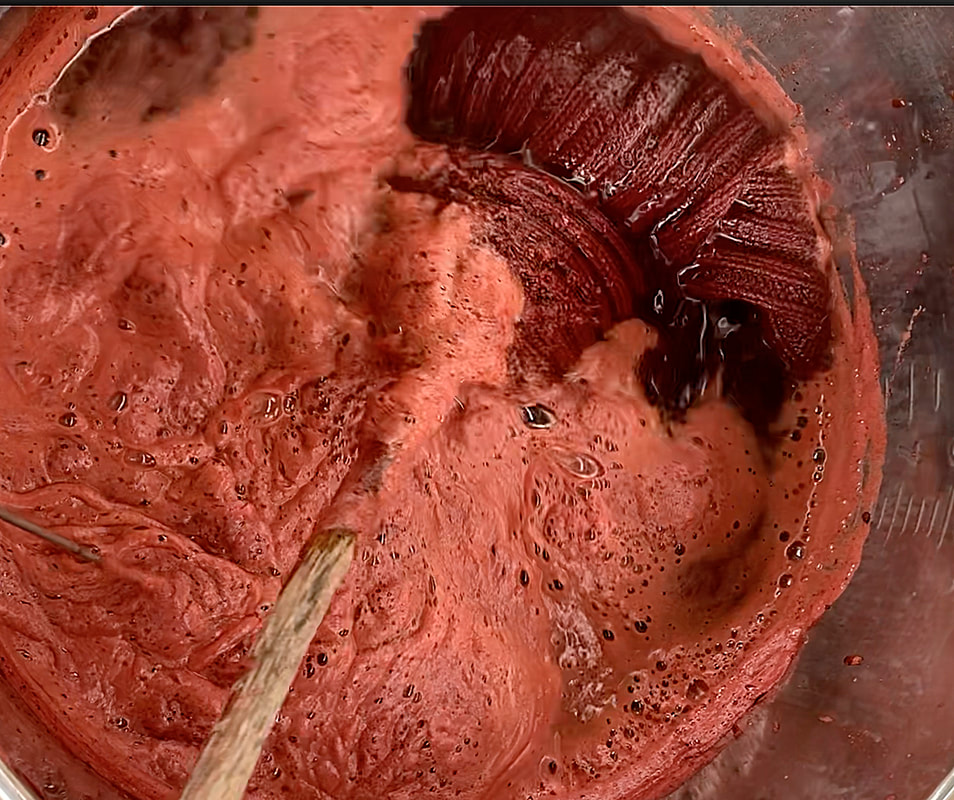 Stirring the dye pot-in the upper right, you can see my sweater is beige no more! You need a lot of madder to get the strong red that’s my favorite color. I’ve had a beige (what was I thinking-me-beige???) sweater, ramie and cotton, for literally decades. One of the reasons I never wear it out is that I don’t wear it much. It fits great. It’s comfortable. But…I’m just not a beige sort of person. I decided that in this dye pot, I would solve two problems; the beige sweater, and getting a rich red on cellulose, which would be for example cotton, linen, hemp bamboo etc., that is vegetable and not an animal fiber like wool. Wool soaks up madder like a sponge, think of the wool Persian carpet reds, they historically used madder for those. But I have repeatedly failed to get a decent red on cotton. I have to admit, if I ever wanted something in pink, the pink from madder is really lovely. But I don’t want pink, I want that deep intense red. So, this time, I pre-treated my sweater and other cellulose fibers with oak galls; anything with a high tannin content would do, but oak galls are as good as it gets with a natural tannin. Black tea has tannin, pomegranate skins have tannin, so does the oak leaves, bark and other parts, but the galls-the tree’s defense agains a wasp-have more concentrated tannin that doesn’t discolor as much, or at least that’s what I’ve read. In fact, when I pre-treated with the oak galls it turned the fabric tan. BUT-I finally got good reds from cellulose! Look at the swatches! I tried several fabrics both with and without the tannin pre-treatment, and the results speak for themselves. And the sweater is now a lovely color-I can’t wait until it’s less than 90 degrees and 100 percent humidity to wear it. 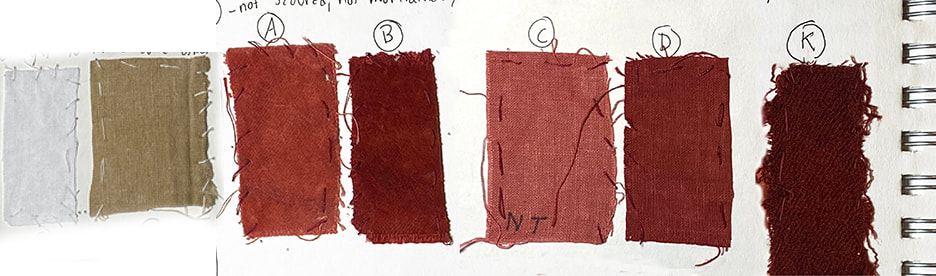 If you look at the swatches A & B also C & D are the same fabric, dyed in the same dye bah for the same time. The difference was B & D got pre-treated with tannin from oak galls. Far let, same fabric as C & D, showing the natural cotton hemp fabric far left, and treated with tannin next to it. K is wool that was in the bath less time than A-D, showing the super deep red.  After a chemical reaction to precipitate the dye into a pigment, the hard work is getting rid of the water to make a dried pigment. In the smaller clear container upper left, you can see how the pigment is collecting in the filter, and the clear liquid accumulating below. Same thing is happening in the big bucket, I'm using fabric in a kind of colander as my filter. Far right, you can see the pigment spread out to dry on a pane of glass. See 4/29/22 post for more on this process It’s not unusual to keep a madder dye pot going for a week or more. You bring the temperature up to 150-160 degrees F. for 10 minutes to an hour, then let the fabric sit in the warm pot, day after day, until it gets to the depth of color you want. At a certain point, the fabrics just don’t get darker. At that point, there are choices. You can get lighter colors, you can add something acidic to get orange-or you can make the leftovers into a pigment. I didn’t have things I wanted to dye rose or orange, so I made a lake pigment. I’m very curious to see how the color will compare to the lake pigment I made this past winter.
But wait, this is madder, so that’s not it. I strained the roots out of the dye pot before I made the lake pigment. Today, 11 days after I first began working with those roots, I put them in fresh water and started a new dye pot. Like I said, madder is a long-term commitment. Too long for one blog post, I’ll have to post again to let you know what happened with round two of madder dye pot #8. I keep a “dye-ary” of all my dye pots, and so I know that yes, this is the 8th madder dye pot I’ve done so far. |
Cindy VojnovicArtist & Educator Archives
September 2025
Categories
All
|


 RSS Feed