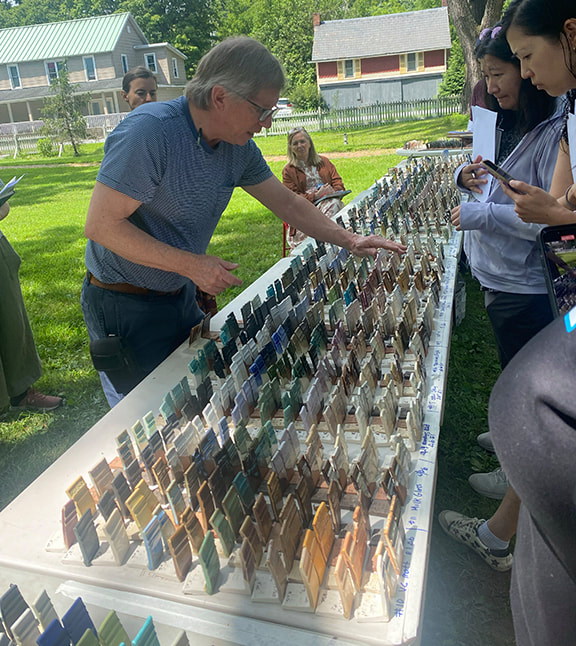
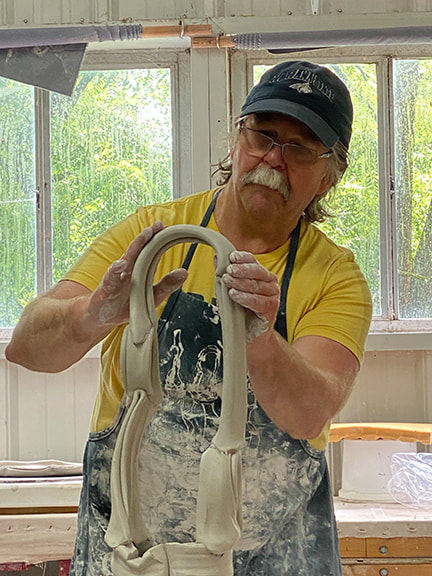
 John Britt with SOME of the tiles he brought with him, showing the logic of what we were doing in the workshop. He had 40+ base glazes, and a sheet with 11 colorants that would get added to each glaze. Each person in the workshop made a different base glaze, made 11 different versions and applied each of those to tiles made from 3 different kinds of clay. There are thousands and thousands of glaze recipes online and in print. But John Britt’s books have such a well organized variety, I just don’t bother looking elsewhere. His YouTube free glaze class is amazing, when I came back to ceramics after many years, it not only removed the rust from what I could remember but gave me a more thorough understanding than I had before. I really didn’t want to do another workshop so soon after the Josh DeWeese one at Peters Valley, but it was John Britt close to home, how could I pass it up? 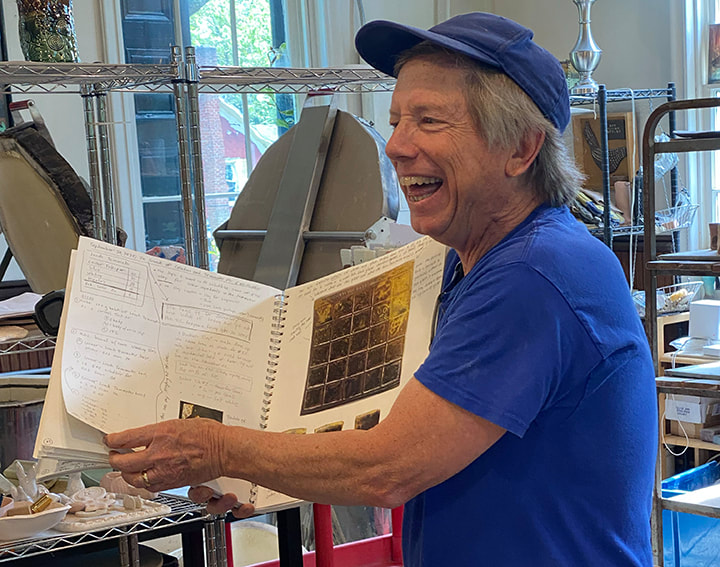 John Britt showing my notebook to the class! The notebook is where I keep track of glazes I'm developing, mostly from local materials. After making my own paint, I already had ground up rock when I started teaching ceramics, so it was a pretty natural segue for me to start formulating glazes. It’s true I also listened to lots of Phil Berneberg’s videos and read a bunch of good books, but John Britt is definitely my glaze hero. As much as I’ve learned on my own, I had never taken a class specifically in glazes. John was so systematic and organized in the way he structured the class that it helped me organize my own thinking about glaze development, and how I might present things to my more advanced students. 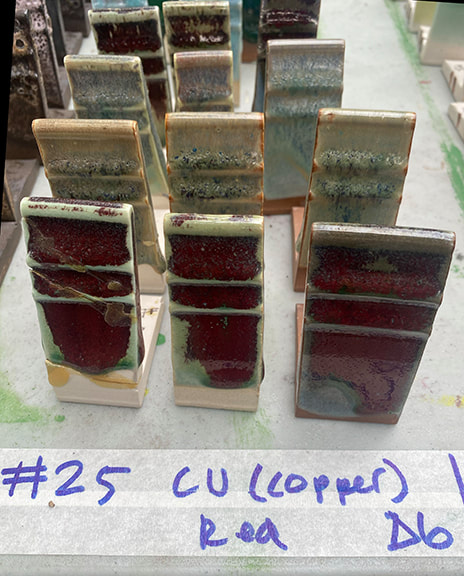 I was particularly interested in the tiles you see in the front; it's a "fake reduction" copper red. My first attempt at mixing this glaze came out gorgeous-but nothing like the copper red you see here. Hmm, I've got my homework cut out for me. The workshop was hosted by Kettle Creek Pottery, a really lovely pottery studio owned by Amy Manson. It was a great group of people. My moment if glory is when John asked me if he could show my notebook to the class! I got a photo of him holding up my notebook which I of course pasted into that notebook.
0 Comments
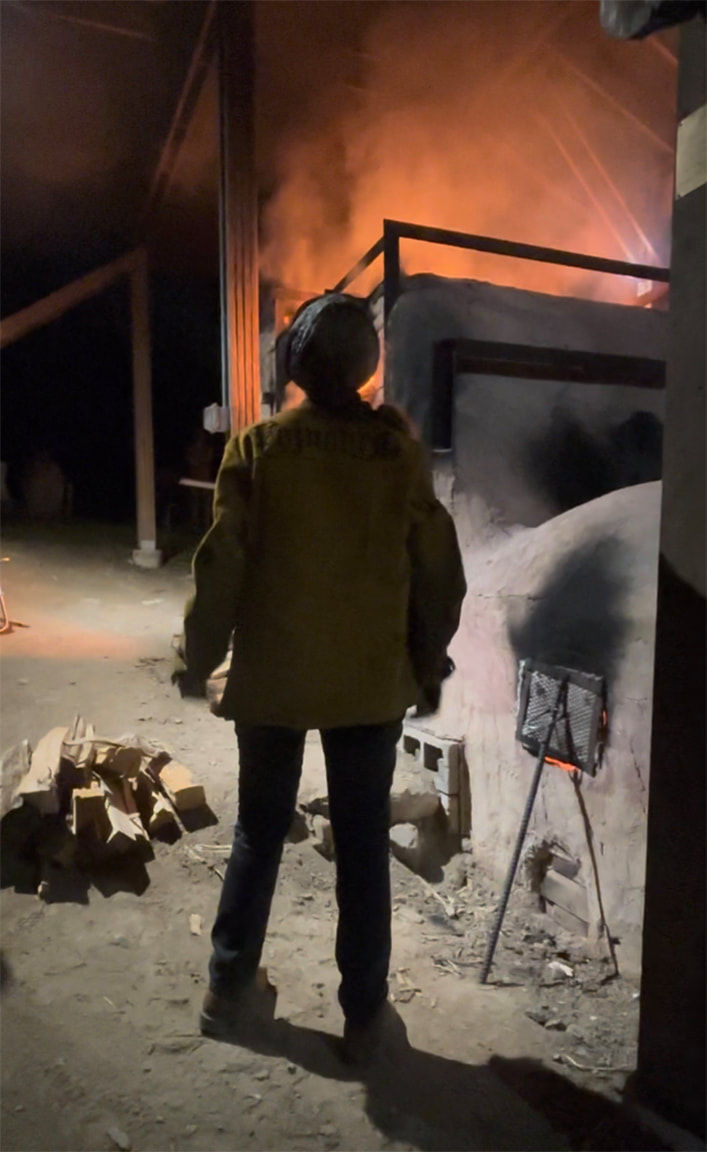 Me watching the noborigama Kiln at Peter's Valley When Peter’s Valley announced this year’s workshop schedule, I was at first perturbed that they had shifted the firing of their anagama (see dancing with the dragon) from August, before fall semester begins, to mid-October. Then I noticed they had scheduled Josh DeWeese to do a workshop firing the noborigama. Josh DeWeese was a long-time director of the famous Archie Bray Foundation, and is a stellar artist I wanted to work with, so I took the plunge and signed up. 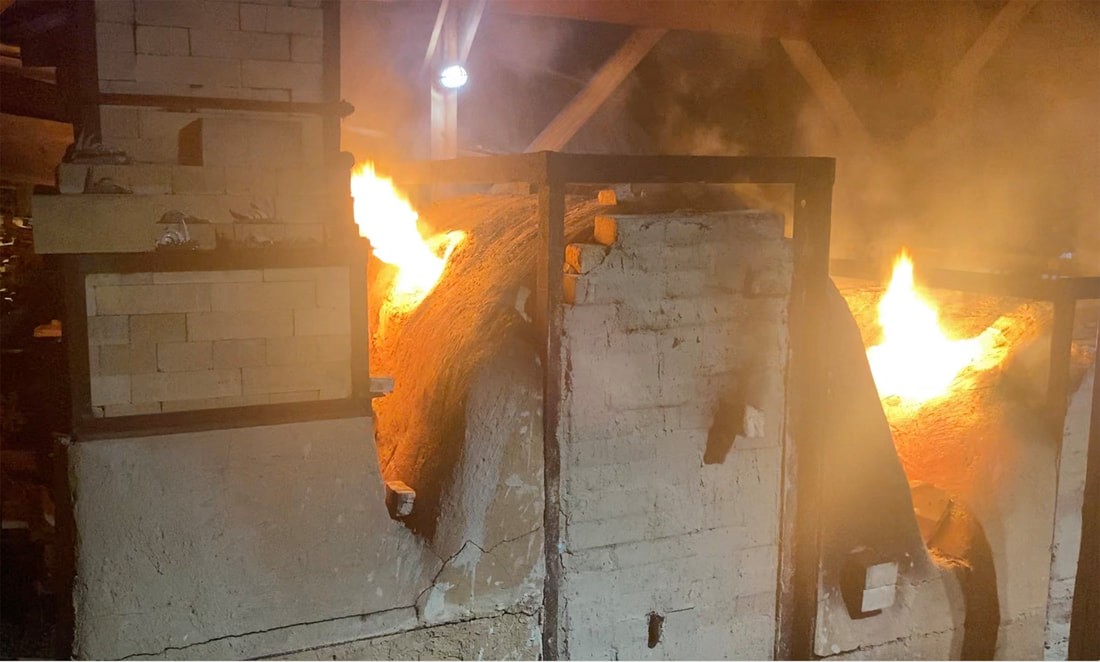 Noborigama kiln, view from the chimney end at the top, looking down on the blowholes of both chambers. When the fire in the blowholes dies down, it's time to stoke with more wood. A noborigama is a multi-chambered wood-fired kiln, and the workshop was shorter than theanagama one so I went in to the workshop expecting a kind of “anagama light” workshop that was essentially loading the kiln and firing it for the whole time. I certainly didn’t expect the actual firing of the kiln to be only 24 hours (after pre-heat) or all the demonstrations. I was expecting that, like the anagama, the outside of the work would be dominated by wood ash deposits turned to glass (glaze) by the heat, and that I would only be applying glaze on the inside of the pots, with little or nothing on the outside. The workshop began with Josh showing us his more elaborate process of glazing, suited to a shorter wood-fire and soda kiln. In the noborigama at Peter’s valley, the first chamber is wood only, and the second chamber is a soda-fire chamber. The soda jacks up the color response and flow of glazes. Applying glaze for that atmosphere (soda) was totally new for me, and to be honest, I didn’t really take advantage of much of the flood of information Josh gave us, especially not on my Medieval inspired vases. There were some in the workshop who did a very good imitation of Josh’s style, and got great pots as a result. But as much as I love Josh’s work-I was thrilled to buy a fabulous pitcher that he used in his glaze demo-but I just couldn’t instantly figure out how what he demonstrated could be used on my Medieval inspired work. Luckily I brought a bunch of mugs that were plain enough in form that I didn’t mind getting more elaborate with the glazing. 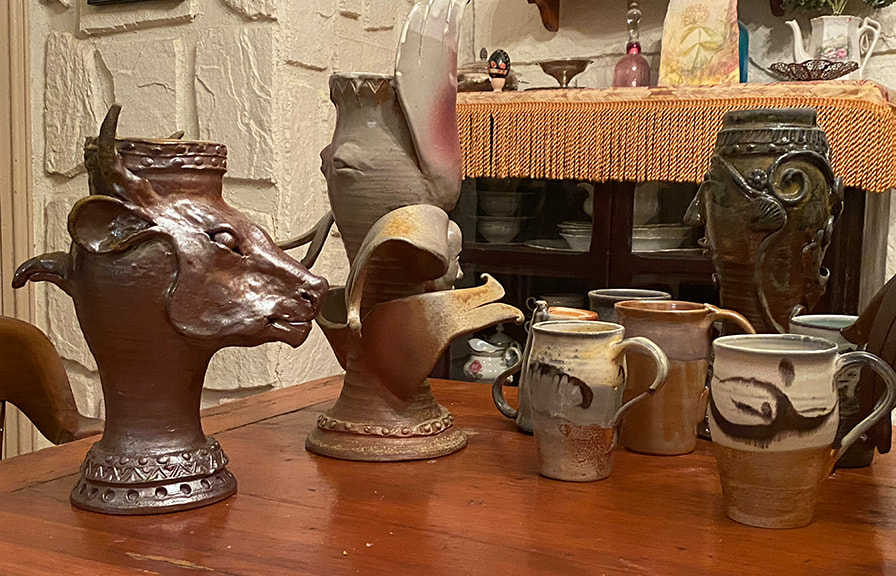 Some of what came out of the kiln, including mugs where I experimented more with the glazes. I have to admit I did a pretty fast down-and-dirty glaze job on my pots, in part because as explained above, I knew I didn’t have the time to fully process how this glazing approach could work for the forms I brought to fire. The other reason was, I wanted to be right there for all the kiln-loading. Loading a wood kiln is a crucial part of the process, and one I’m keen to learn about since I actually get to do that at the NCC East 40 wood kiln. It was so exciting to see my work go into the kiln; it seems that catenary arch kilns just love my work. “I need something tall and skinny” is almost a cliché when loading a catenary arch kiln; my work loves snuggling up to the curved walls of the kiln. When they put in my Hypnos at the top of the arch, I had to snap a photo before all the rest of the work got packed in. 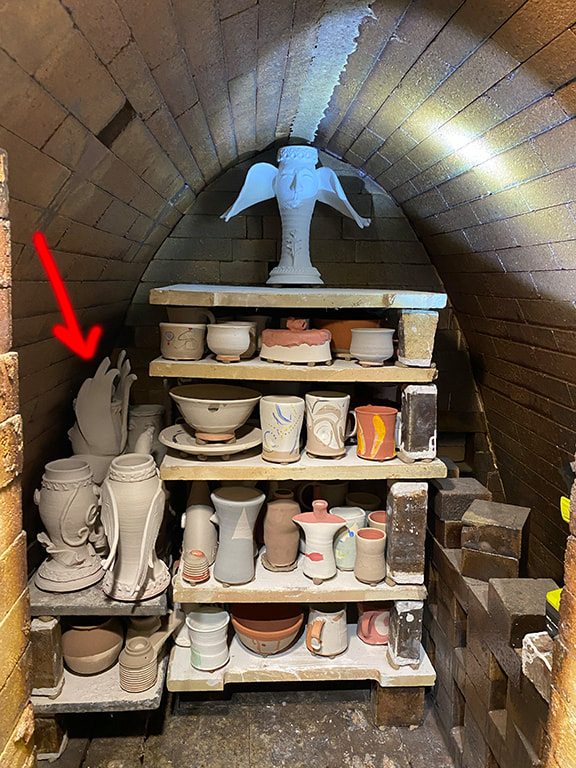 Red arrow pointing to an entire shelf of my work, snuggling into the side of the arch. Hypnos at the top doesn't need an arrow at this point, though later there was of course plenty of worked packed around him. I of course signed up for a double shift in the overnight, and figured if the firing didn’t end on my shift I would just stay until it finished anyway. I can’t lie, it felt a little weird doing a short firing with so many people. Last December I did a 24 hour firing at the NCC wood kiln, but there were way fewer people, and I did the last 17 hours of that firing non-stop. Before my shifts, I did a lot of hanging out at the kiln watching others do all the work, which was very strange for me. Firing the anagama for a full week, everthing happened slower. I felt like by the time I adjusted to the rhythm of this firing, it was over. 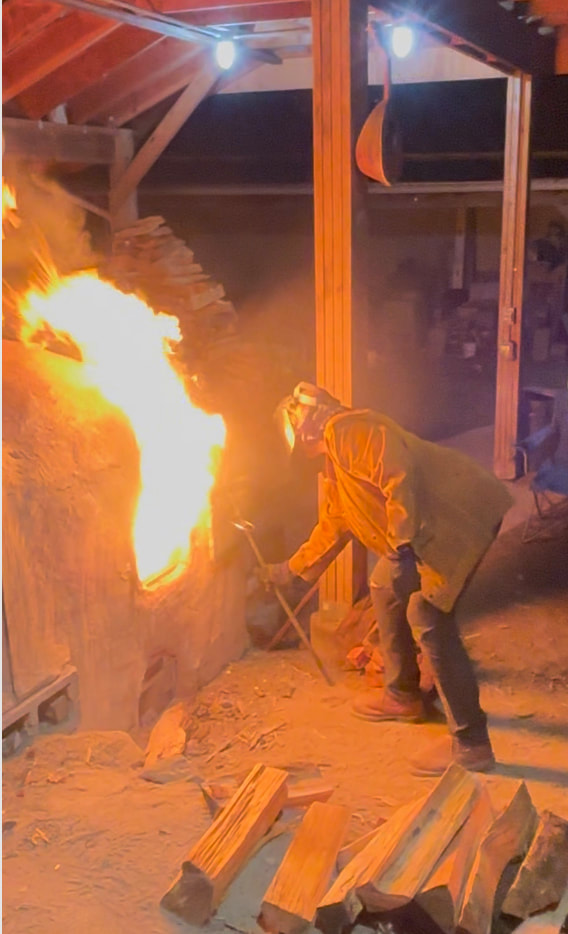 A shorter firing means a shorter cool-down period. After the anagama, we left and came back the next week. But since this was only a 24 hour firing, we stayed while the kiln cooled. That was when Josh DeWeese switched into high gear, spending a whole day and the following morning in a marathon making demo. It made me tired just to watch him, 😂 ! His sense of humor was delightful, I don’t know how he managed to tell fun and illuminating stories while he made incredible work and simultaneously explained what he was doing and gave insightful tips. I frequently botch demos because I’m so busy trying to explain what I’m doing that I can’t do it. (Once I joked I can’t chew gum and walk at the same time, and one of my students, apparently never having heard that expression, took me seriously, and said “really?!”) I absorbed so much from Josh DeWeese!!! Not just technique, or art-but how to make a supportive positive space in which people can best learn. His teaching is nothing short of spectacular, he gets it right from every possible angle. Generosity is the term that springs to mind. He really gave of himself, and he’s got a lot to give.
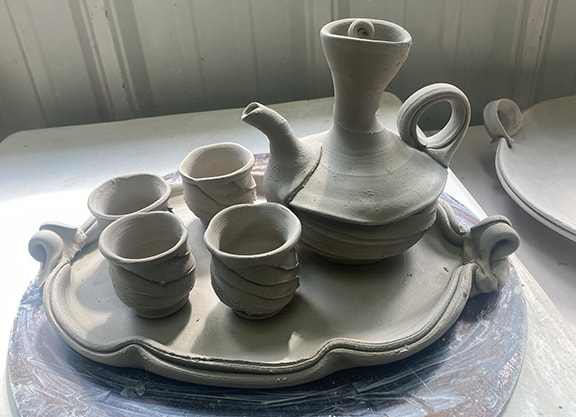 Among the many pieces he made was this "liquor set" including cups, ewer and platter. You can see a giant platter that he made in the upper right hand corner.
When we gathered to unload the kiln, he coached us; “the appropriate response when something comes out of the kiln is Ooh! Ah!!” He had us all reapeat the oohing and aching until we reached an appropriate level of positive enthusiasm. He said not to be dissapointed if something didn’t turn out as expected; to live with it before making judgments. That bit of advice I had heard before, but it is so true with woodfiring in particular. You often get something out of the kiln that is not at all what you were going for-and it can take a while to figure out if that’s a good or a bad thing. 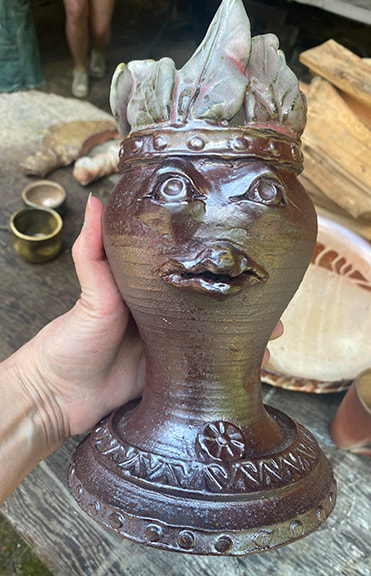 One of my smaller vases, hot out of the kiln. The East 40 clay can totally take over a glaze. I had to apply the glaze at the top on his crown of leaves/feathers incredibly thick for it to show up at all. I felt like the pace of the workshop was perfect. I got enough rest that I could absorb all the new experiences and information like a sponge, but at the same time, there was never a dull moment. I’m still absorbing and working with what I learned, and will be for some time to come.
Finally, the thing that astounded me most about the Josh DeWeese workshop was that it did exactly what a vacation is supposed to do. I felt like I got out of the usual grind, experienced wonder, and gave me time to reflect on just how blessed I really am. It’s now a few weeks since the workshop and I’ve been working a lot, but that feeling is still with me.
I knew I wanted to use gold on my ceramics before I even knew why! Real gold will evaporate, “volatilize” is the technical term, if exposed to the high temperatures needed to fire the clays that I use. I confirmed this the hard way, three years ago I embedded some tiny bits of gold foil around the rim of a pot, and even in the preliminary “bisque” firing (not as hot as the final glaze firing) the pot emerged from the kiln without a trace of the gold. You’ve probably seen fine china that has gold trim or accents, for example around the edges. The way it’s done, is that you glaze and fire the whole thing first, without the gold, at the usual high temperature. Then, you apply the gold and fire at a much lower temperature to “fix” the gold permanently onto the ceramic. This is what’s called an “overglaze,” and what I finally got around to doing!
With wood firing, you can’t control exactly how anything is going to come out, and honestly the serendipity of it is a huge part of the attraction. But sometimes a piece comes out of the wood firing and, well, needs some help. Well, I had some pieces that just needed a little oomph, a little spark, an accent.Two of them had a lovely, ivory colored satiny glaze surface; but they were to subtle, they needed an accent, some pop. On the other end of the spectrum, I had a piece with a kind of mottled surface, mostly quite dark. Finally, I had a piece that had quite nice “flashing”-effects of the fire on the clay, which highlighted the sculptural form really well-but the surface was quite dull and matte, no shine.
 Opening up a wood kiln is like unwrapping Christmas presents-you may have an idea what to expect, on the other hand, you can get some real surprises! What I find the most strange, is how difficult it can be to figure out if the surprises are good or bad. It can take months, even a year or more to really “digest” the serendipitous effects off flame, wood ash and the myriad variables of the firing.
I had two sculptural, medieval inspired vases in the kiln, both had a salt-white glaze, and came out weirdly brown speckled. My first response was yuck, not what I had hoped for-and not what I had got from the same clay and glaze combination in Previous wood firings in the same kiln! In fact, there was another vase in this firing, same clay, same glaze, but it was a re-fire from the previous firing. In that previous firing, there were parts of the kiln that just didn’t get hot enough to properly melt the glaze. But this time, that pot came out with a kind of lovely glow-I’m so glad I re-fired it. But what of the two speckle monsters? Hmmm. Not so sure about those, have to sleep on that for a few months.  Then there were the mug re-fires. These were all made from “C Body” East 40 clay, and had been through a 6 day anagama firing this past October. They too must have been in cold spots in that firing, the glazes were rough and underfed. This is a clay I formulated less than a year ago, so I’m keenly interested in putting it to the test in every way possible. I had pieces in the Peter’s Valley anagama firing, in locations of the kiln that got up to cone 11 (the clay was formulated for cone 10) and there was no trouble at all. No flaws of any kind in the clay. There were also no flaws after the October 6 day anagama firing-but this re-fire kind of “fried” them, since they were located in parts of the kiln that overshot the firing range of this clay body. Let me explain.
We used cone packs that had two cones below our target, (cones 8 & 9) our target cone (10) and a “guard” cone of 11. In the photos, the order from left to right is 8,9,10,11. In the first photo, you can see a perfect 10.The number 10 cone (third from left) is making a perfect arc, the tip down to the level of the base. There is daylight under the arc, as there should be. By contrast, the lower temp cones 8 & 9 are no longer an arc, they are a puddle, and cone 11 is only beginning to bend. In the second cone pack, there is no daylight anywhere under these cones, even cone 11 is a melted puddle on top of the clay that held the cones in place. What this means is that in that section of the kiln, we blew past our goal of cone 10, and because 11 is a puddle we must have actually hit cone 12. I found out the hard way the upper limit of the C body clay; it was fine at cone 11, but cone 12 was just too much. One of them cracked early enough in the firing that the glaze hadn’t melted yet, since, the glaze healed over the crack completely. Another had little bloat bubbles. The work had been over-fired enough to become so brittle that several of them had chips that broke off the bottom where there was no glaze to support the clay. To be fair, they were really close to the firebox, which hit at least two cones above our target, as explained above. And in spite of the flaws in some of them, others have no visible flaws and they certainly didn’t melt into a puddle or even slump, which can happen when a low-fire clay is high-fired.
I fired an odd little piece I had done as a demo for texturing slabs, and making a draped form with visible slab joins from them. On the inside I sprayed on the East 40 ash glaze (that I formulated) in a fairly thin layer, and the outside was a combination of two different shinos and a salt white glaze and a little bit of the East 40 ash. For a little throwaway pot-I was going to just recycle the clay after the demo, but decided to keep it to just to experiment with glazes-I’m surprised at how good it looks.
In short, the work I cared most about-the medieval inspired vases-came out just whatever, while the piece that took me 10 minutes to make came out great. Or at least that’s what I think today. Maybe I’ll wake up in 6 months and have a totally different opinion. Please comment and let me know what you think!  Left, bisque fired; right, same vase after glaze firing. In my first post on my new series of Medieval inspired ceramics, medieval-inspired.html I wrote that “So far only a few of these pieces been glaze-fired.” I think one of the strengths of this whole series is the interaction between a traditional thrown form with decorative/geometric/abstracted elements and incomplete figurative elements. An essentially one-color glaze keeps the ambiguity and imaginative leaps that the viewer can enjoy. I have come up with two strategies for making the glazes have some depth, variety and interest without getting contrived looking; local (and sometimes wonky) materials and wood kiln firing. As you can see from the vase above, glaze is not always going to hugely change the look of the piece. Even with the different background, lighting and point of view, this vase didn’t change its essential character when glazed. I formulated the glaze that I used featuring rock that I picked up off the side of route 611 in Easton. You might think that I could have used just any white glaze; but look closely at the comparison photos below. On the left, the vase was glazed with the glaze that I inherited in the ESU studio, with all commercial ingredients. On the right, another vase glazed with my rock glaze; I know it’s not a huge difference, but I prefer the rock glaze. So on the one hand, the glazing doesn’t necessarily radically alter the look of the piece from its pre-glazed state. But on the other hand, the glaze-and how it’s fired-really do matter, and give not only practical advantages like hardness and waterproofing, but improve aesthetics as well.  At left, vase glazed with all commercially produced materials, someone else's glaze recipe. At right, glaze I formulate that includes rock I picked up from the side of the road near where I live. The vases above were fired in an electric kiln; the first post I made about this series showed work that was fired in a one-day wood kiln firing. Wood kiln firings can have many serendipitous effects, between wood ash landing and melting onto the work (that was probably how glaze originated) fire hitting the work and the reduction atmosphere which causes both the clay and glaze to achieve different effects. The longer the firing, the more wood ash you are going to get, which is one of the reasons I’ve held off firing a number of my pieces; I will be taking the Anagama Wood kiln firing workshop at Peter’s Vally next month, where I can bring 30 pieces! Whether I’m using rock glazes or wood kiln firing (or both) my goal is the same; I want natural effects, not contrived painting/coloring.
 Vase made from the new clay body featuring East 40 clay. You can see the clay with no glaze at the bottom, and where I did strokes of wax resist as seen on the view to the left. A glaze featuring the East 40 clay was used at the top of the pot, you can see it's darker than the glaze below the neck of the pot.. As promised, some results from the test kiln firing. After making the part 1 post, I realized that it was just too technical for a blog post. I reached a kind of crossroads where I realized I needed to create a section of the website for technical information. If you want something more in depth than this post, go to my new Ceramics-Technical page, and the pages that branch off of it. The little test kiln did reach cone 10 (approx. 2,381 F) but not without a battle of many hours in the sweltering heat. Luckily, it was worth it. The firing gave us really critical information; how will the new clay body behave at high-fire temperature in reduction (oxygen starved) kiln atmosphere, which is how we fire the wood kiln? And, how will the 25 glaze recipe variations with the East 40 clay look and behave on the new clay body? Overall, the results were a smashing success. Both clay body, glazes, and the way the glazes look on the clay body passed with flying colors. Again, I'm not going to go into all the technical results here, but I do want to show you some of the highlights of what came out of the little kiln. 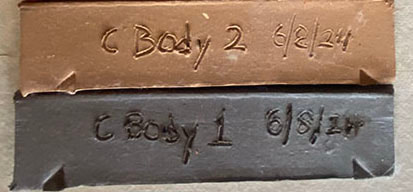 These test bars were literally cut out of the same slab of clay. The on on the bottom was in the test kiln firing (in an oxygen starved "reduction" atmosphere) and the one above fired in an electric kiln in an oxygen-rich atmosphere. In the test bars above, you can see the color of the clay with no glaze for yourself. In addition to the tile in the test kiln firing, the dark one at the bottom of the photo, Gabbry Gentile was kind enough to fire the one on top in the electric kiln up at the ceramics studio in Penn Hall on the main campus. I formulated this clay body for high temperature firings like we do in the wood kiln at the East 40; the real shocker, was that this clay body works at the medium range temperature used in the studio on campus! I won't go into the technical details here, but suffice it to say I was honestly shocked at how well this clay performed in an electric kiln at mid-range temperature!  This was one of 25 glaze variations tested; the only ingredients used in this glaze are the clay from the East 40, wood ash from the wood kiln at the East 40, and eggshells that I saved after using eggs from a local farm. Ash glazes are supposed to show dramatic drips; the trick is, you don't want them to run off the pot. This test tile was photographed on its back because of sun glare, but it was standing up on vertical when fired in the kiln. The pleasant surprise was that all the variations of the ash glaze stayed up on the tile, none of them ran off the tile at the bottom which is a big problem with a lot of ash glazes. Many ash glazes can only be used at the top of the pot, they are so runny. This was the runniest variation, and even it didn't run off the tile. Long story short, we already have usable glazes based on the East 40 clay and wood ash, and they work great on the new clay body!  2 parts East 40 clay to one part ash from the East 40 wood kiln, on the new East 40 clay body Above is the simplest glaze recipe I tested-and my favorite result! The drips are less dramatic without the eggshell. It's such stable glaze that I can see using it on an entire pot, not just at the top for a drippy effect. The color comes primarily from whatever is in the East 40 clay, educated guess, a lot of iron.
Getting back to the vase at the top of this post, the dark part at the top is the same as the tile above, except there is an addition of copper oxide. The pot was first dipped in a glaze we had on hand from previous wood kiln firings, we wanted to see how it worked on the new clay body. The red you see, especially on the view to the right is actually from the copper-rich glaze I was testing at the top! All in all, we got lots of very helpful information from the test kiln firing. In all honesty, I didn't expect this much success in a first time at full-temperature firing! This summer I am working to formulate glazes and a clay body from the local clay dug from the Northampton Community College (NCC) East 40. https://www.ncceast40.org I’m weird; for me, waiting for the next glaze test to come out of the kiln is like a kid trying to wait to unwrap a present. But while I’m waiting for the tests that will come out of the kiln on Thursday, I thought I’d make a post about the preliminary testing I’ve already done.  This is the last row of a 25 square (5x5) tile, which is why it starts with 21. Squares 1-19 were testing other ingredients outside of the scope of this post. See explanation below. Spoiler alert-I’m going to show you the best first, see above. To set this up, you have to realize that the clay at the East 40 is very rich with ingredients (probably iron, maybe manganese) that go very dark when fired to the high temperatures (roughly 2,380 degrees) we use for our glaze firings. I discovered a “magic powder” from my kitchen, that makes the East 40 clay fire light, and opens up striking color possibilities! I get eggs from a local farm, and if you’re familiar with truly free-range eggshells, you realize they are at least twice maybe three times as thick as factory farm eggshells. That's why eggshells build up fast at my house! Eggshells are on average 95% calcium carbonate, and calcium carbonate is one of the most common and useful ceramic ingredients. In glazes, calcium carbonate is usually sourced from whiting or talc. Eggshells, when fired, shrink in volume tremendously, which can cause problems in glazes. I did a preliminary bisque firing of my ground up eggshells, so that the shrinkage would happen BEFORE I put them in a glaze. You can see on the left in the line blend above, how dark the East 40 clay fires even though tis test was fired at a lower temperature than we use in the gas and wood kiln firings at the East 40. But wait! Add a little eggshell, (second from left square) and the color changes. Add a little more (center) and wow, a totally different glaze color, without adding any colorant!! But wait, there’s more. Add a little black copper oxide (colorant) and you get one green, a tiny bit more and you get a different green! I designed an entire 25 section biaxial tile-5 rows of squares by 5 rows of squares-investigating the interaction between 4 ingredients, as inspired by this line blend. All of the variations use the East 40 clay, and wood ash which is used as a flux (an ingredient to melt the clay into a shiny glaze). The balance of East 40 clay to wood ash is varied, explored both with and without the other two ingredients, the eggshells and the black copper oxide. Look for a post on when this tile comes out of the kiln!  Like the tile above, this was the last row of a 25 section tile. Note that on the left, there is not enough wood ash to melt the clay enough to make a smooth and shiny glaze. Moving to the right, I'm adding a little more wood ash in each square. by tile 25 it loses the rocky texture of the first tile, getting closer to a usable glaze. Adding Wood Ash to East 40 Clay This test uses only two ingredients. Going left to right, I added increments of more wood ash to the East 40 clay. A few notes about this; for the ceramic artists out there, this was cone 6 oxidation. It's obvious that the 5 parts clay to one part ash is not nearly enough ash. (The ash is used as a flux, that is, to help melt the clay into a glaze.) I made impressions into each square with a finger, making a kind of "lake" within each square, and also applied the glaze unevenly to see how various thicknesses of the glaze would work. I'm working with such tiny amounts here that of course more testing is needed to nail down percentages, but it's pretty clear that the wood ash I was using, which was from the wood kiln at the East 40, needs to be over half the mix to melt the clay. I'm currently working on glazes for cone 10, so at that hotter temperature obviously everything will melt more than at this cone 6 (lower temperature) test.  This too was part of a larger 25 section tile; this is one line, adding copper carbonate to a mix of East 40 clay and wood ash. Adding a colorant I wish I had done the line blend of just the clay and wood ash first! Here there isn't enough wood ash in the mix to start, and as you add a colorant like copper carbonate, that tends to retard melting and make matters worse. Note that even .3 grams is way too much colorant for a first step! Instead of green, which we would expect from copper carbonate, we're almost at black. That's why I start with simple line blends-I'm not using much in materials to get this kind of information that points me in the directions I should go.  Another line blend that was the last row of a 25 section tile. Fired at cone 6 in oxidation. Above, I used 4 g of East 40 clay to 2 parts of a commercially produced flux, the same percentage of clay to wood ash from the last test. The commercial flux has a stronger action but even so, it's under-melted. I'm using a commercial mason stain for the colorant. The main problem is that the clay when properly melted into a glaze is so inherently dark, it's hard to notice much color difference from the base glaze at left with no colorant.  Again, a line blend that is the last row of a larger 25 section tile. Fired at cone 6 in oxidation. In the basic mix at left before I started adding rutile, it's melting ok but not great. Rutile can add color, texture and odd what I'll just call variations to the look of a glaze. Like the cobalt carbonate, it also makes the glaze more matte, or under-melted, under vitrified in ceramic terminology. Matte glazes are a thing, we don't always want super glossy glazes, but they can be more prone to leaching and other defects/weaknesses. I do want to do more tests with rutile going forward, just that every time I add an increment of rutile I know I need to add an increment of flux (melter) at the same time.
The way-back story I first used this clay when I was working on my master’s thesis, using a simple mix of half East 40 clay and half of a commercially available clay to make loom weights. (See crossing in my portfolio section) In my summer of 2022 Residency at the East 40, I used the clay, raw and roasted in a bonfire, as pigments for paints that I made and used in the “Imaginary Landscape” series of paintings that were featured in my Fall 2022 solo exhibition. During the residency, Walter Heath saw me grinding up rocks for pigments, and immediately had visions of using them to develop glazes. That summer I wasn’t ready to go there-but in 2023 I began preliminary testing, not just for the East 40 clay, but from local rocks I had picked up and processed. In this post I’m only showing the initial line blends I did with the East 40 clay, omitting all the rock glaze tests and tests on clay I dug out of my front yard-it’s a long enough post as is! |
Cindy VojnovicArtist & Educator Archives
September 2025
Categories
All
|


 RSS Feed